Castle Hill Brick Rehabilitation
Before and After
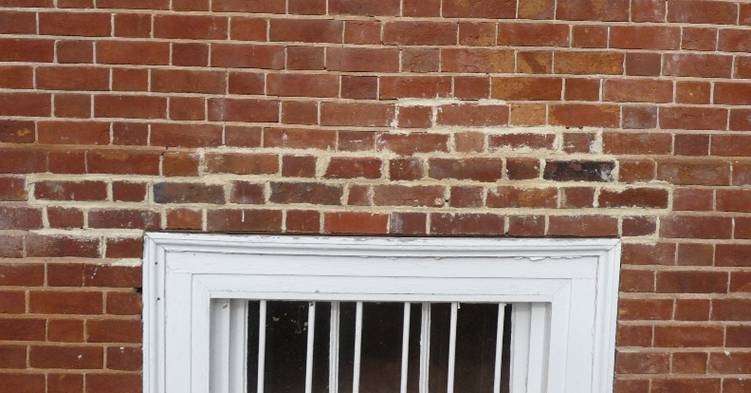
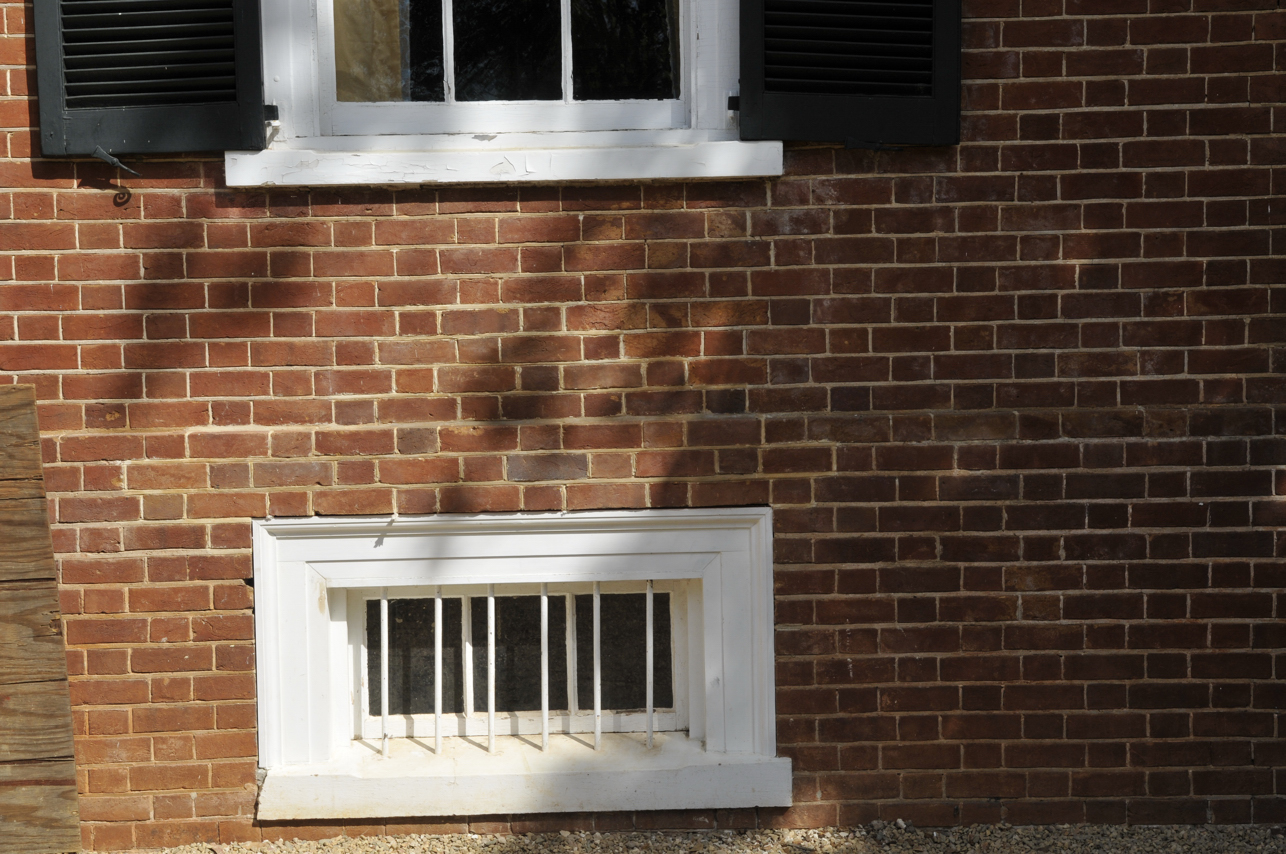
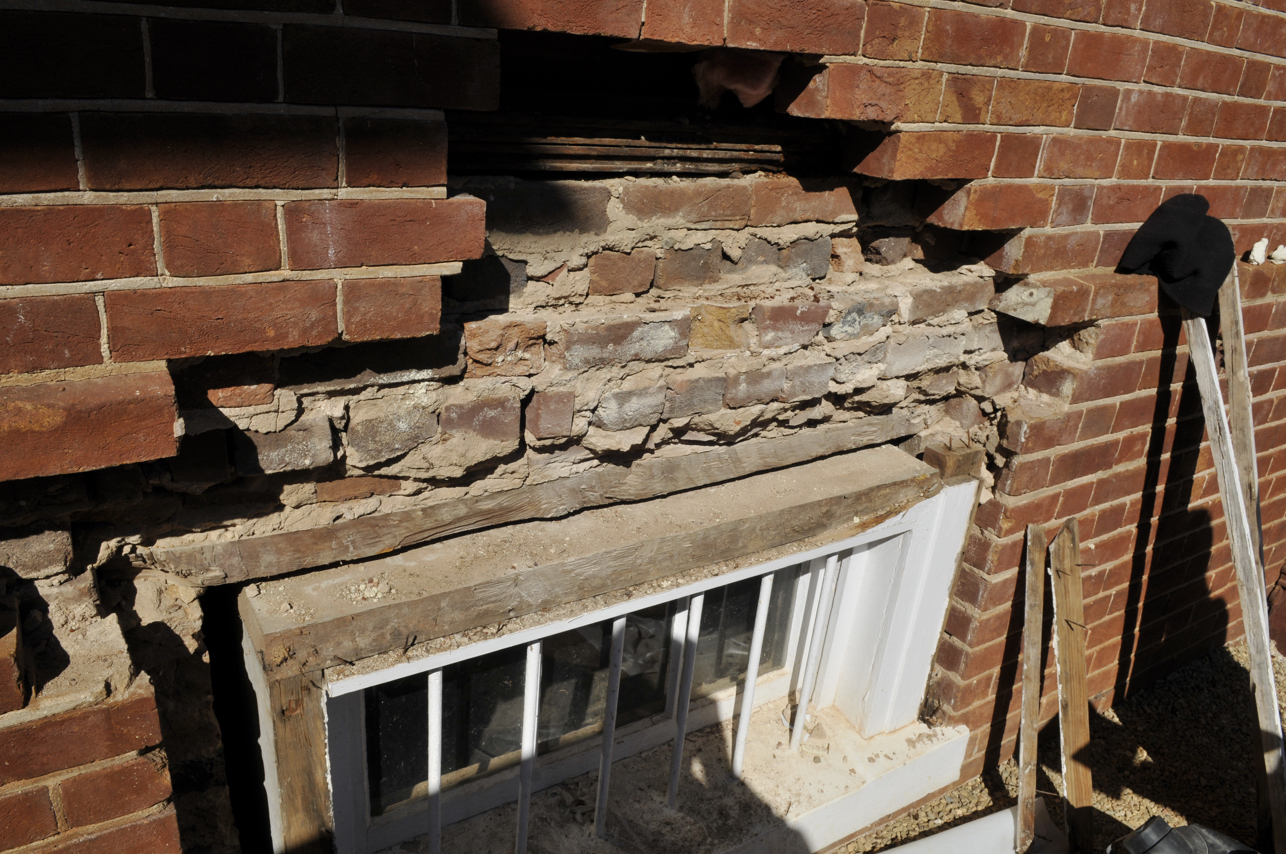
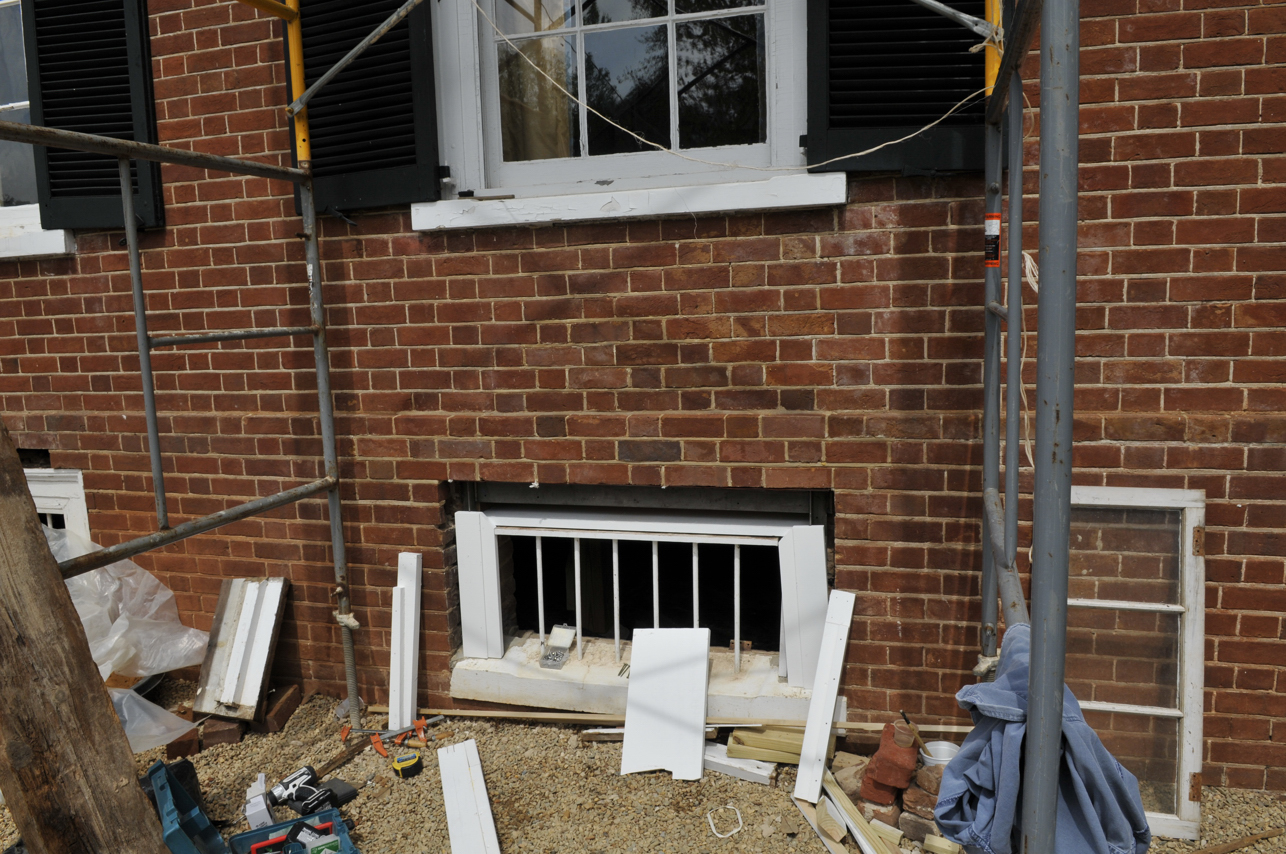
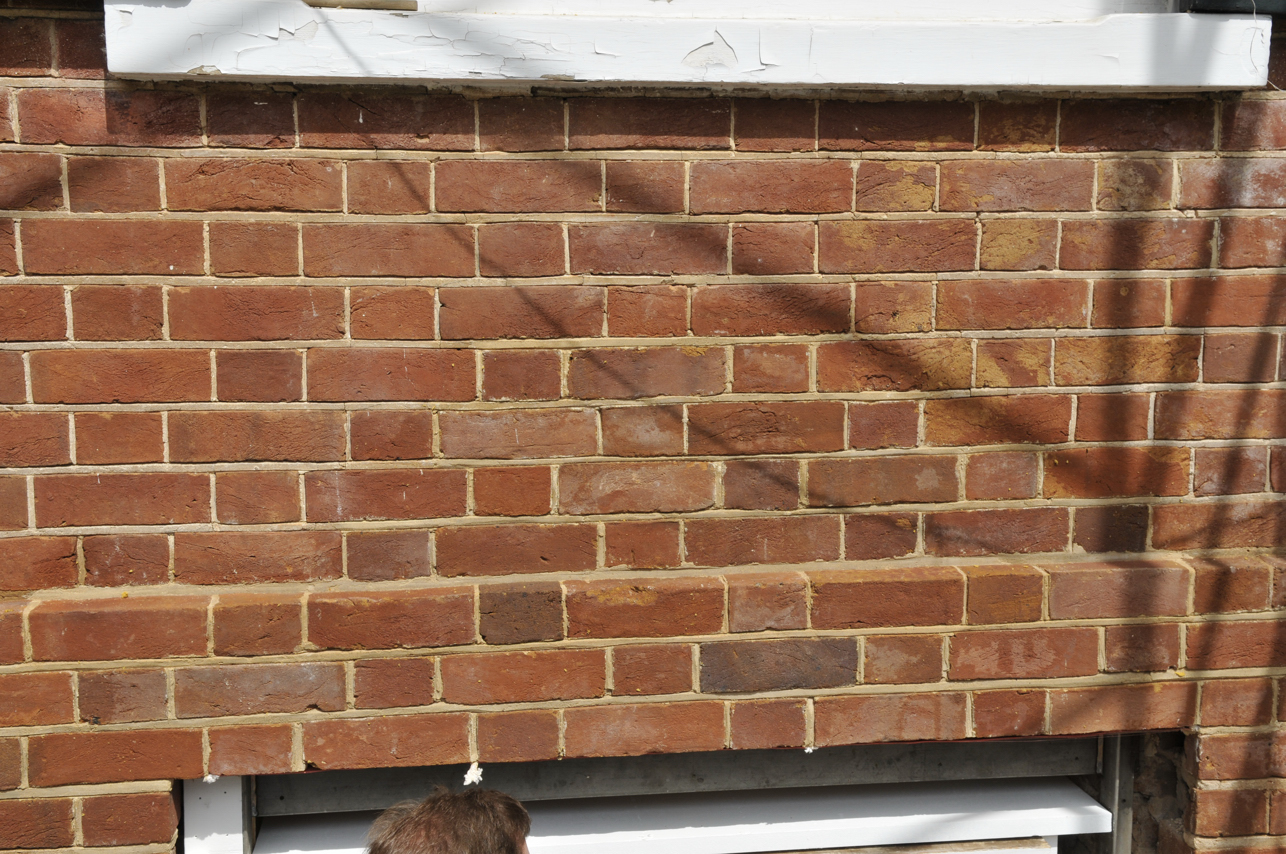
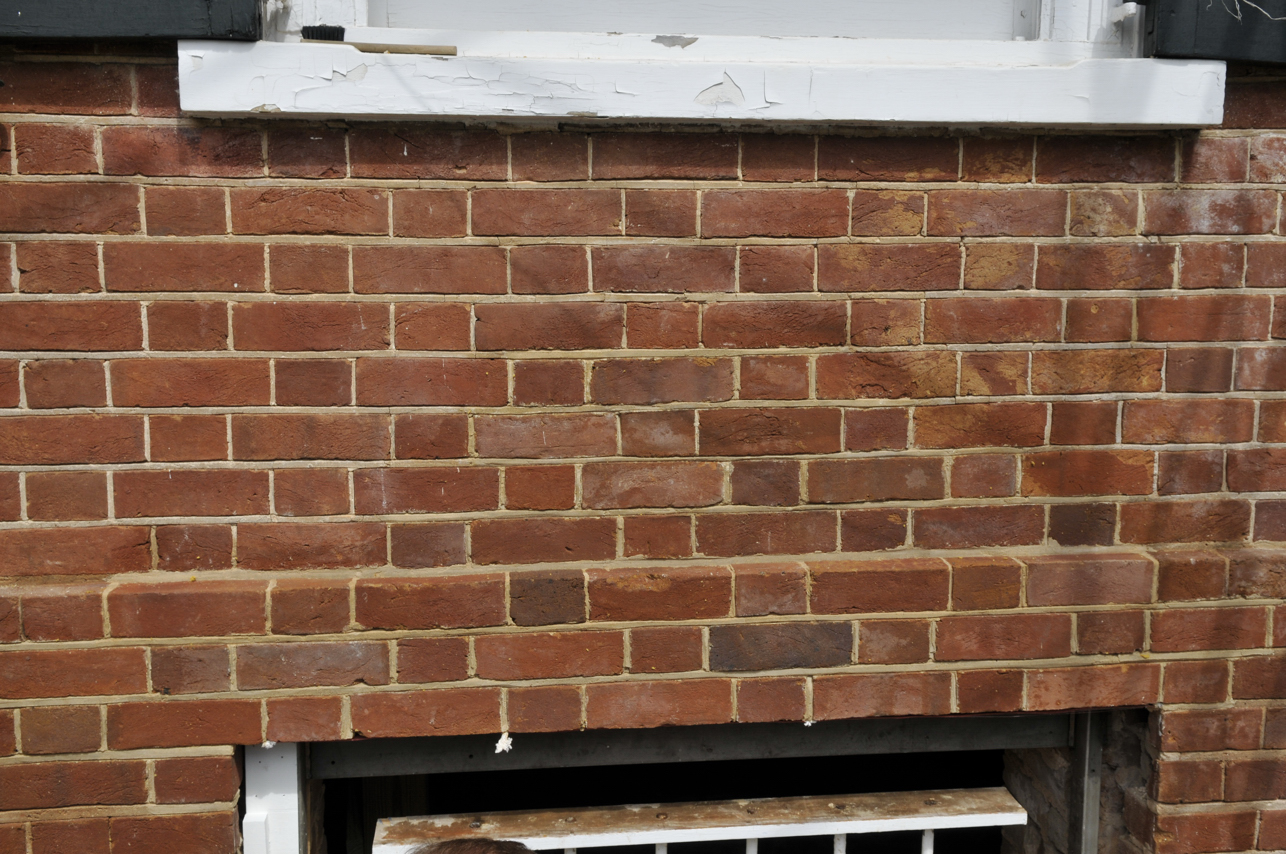
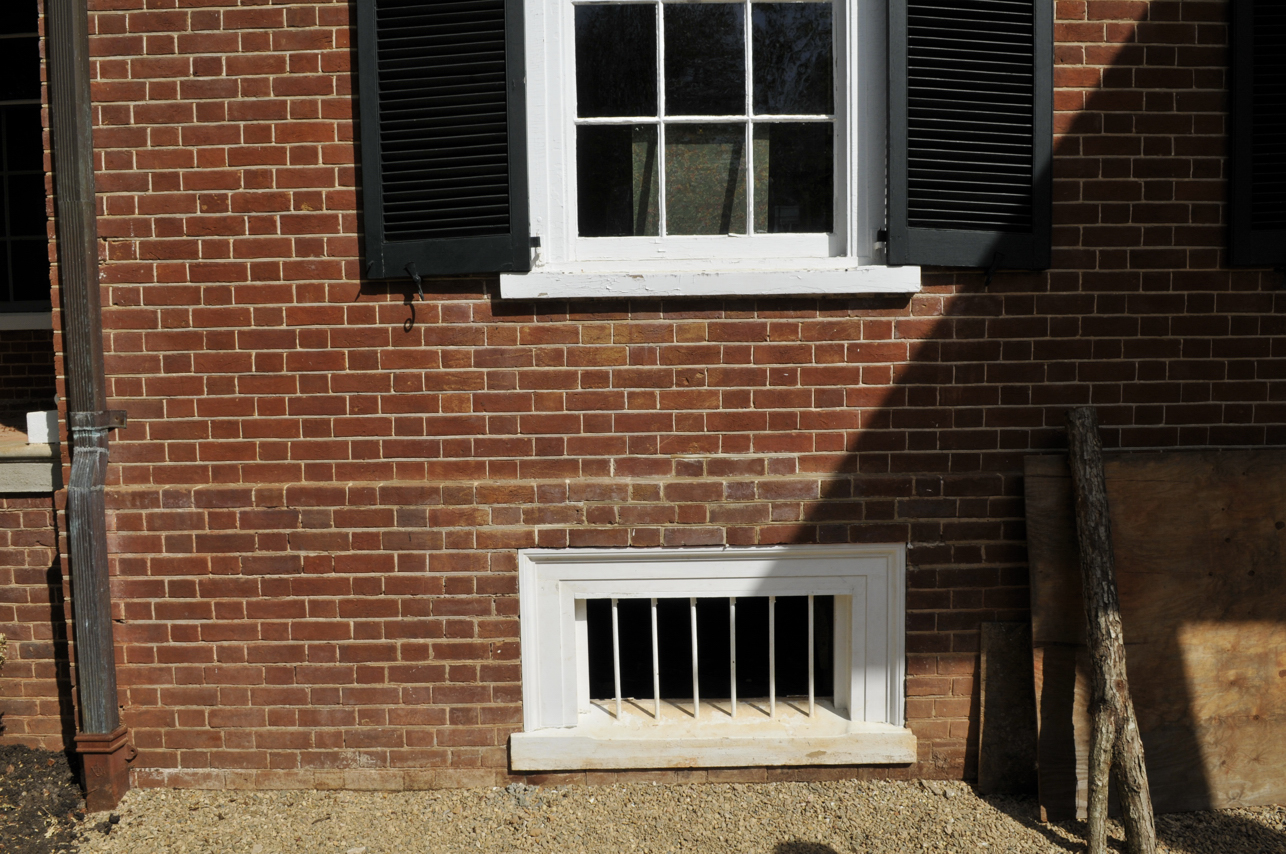
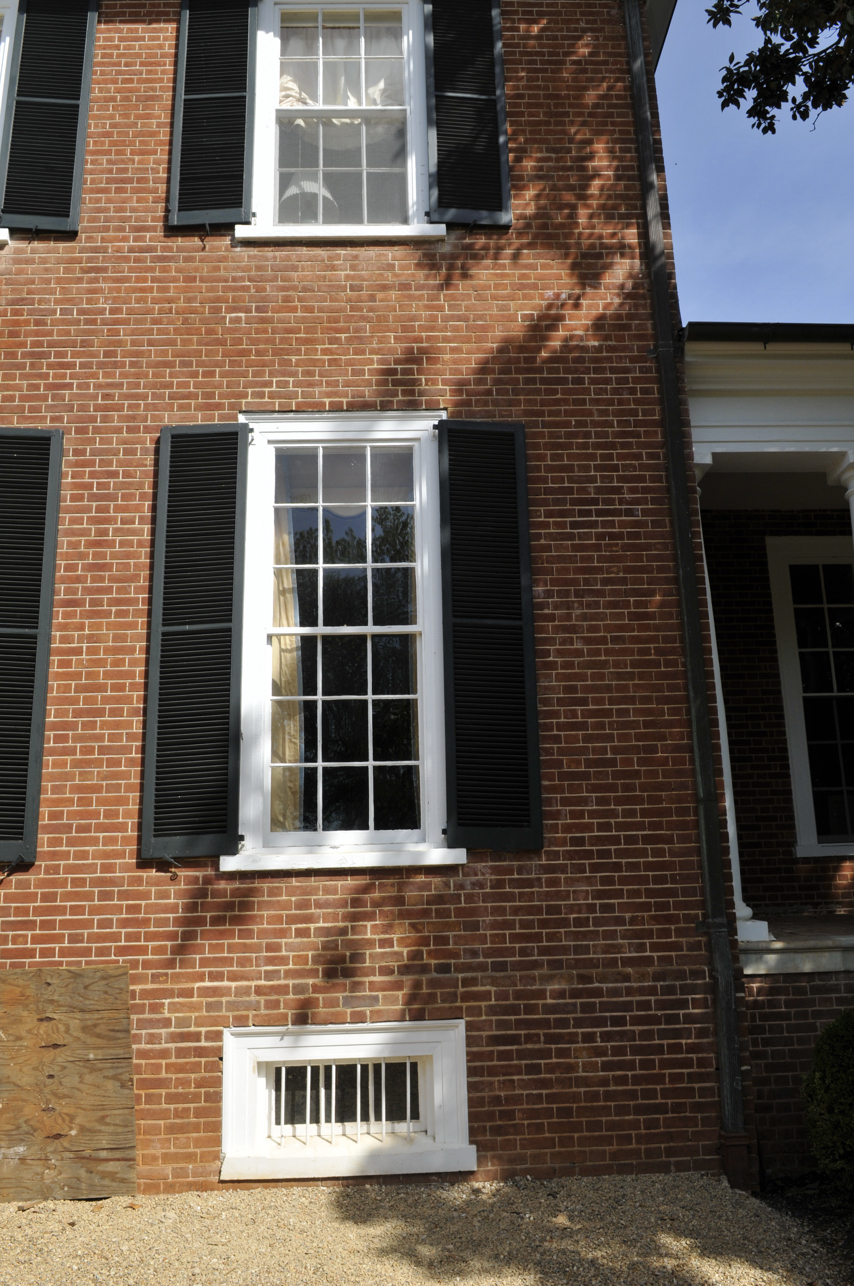
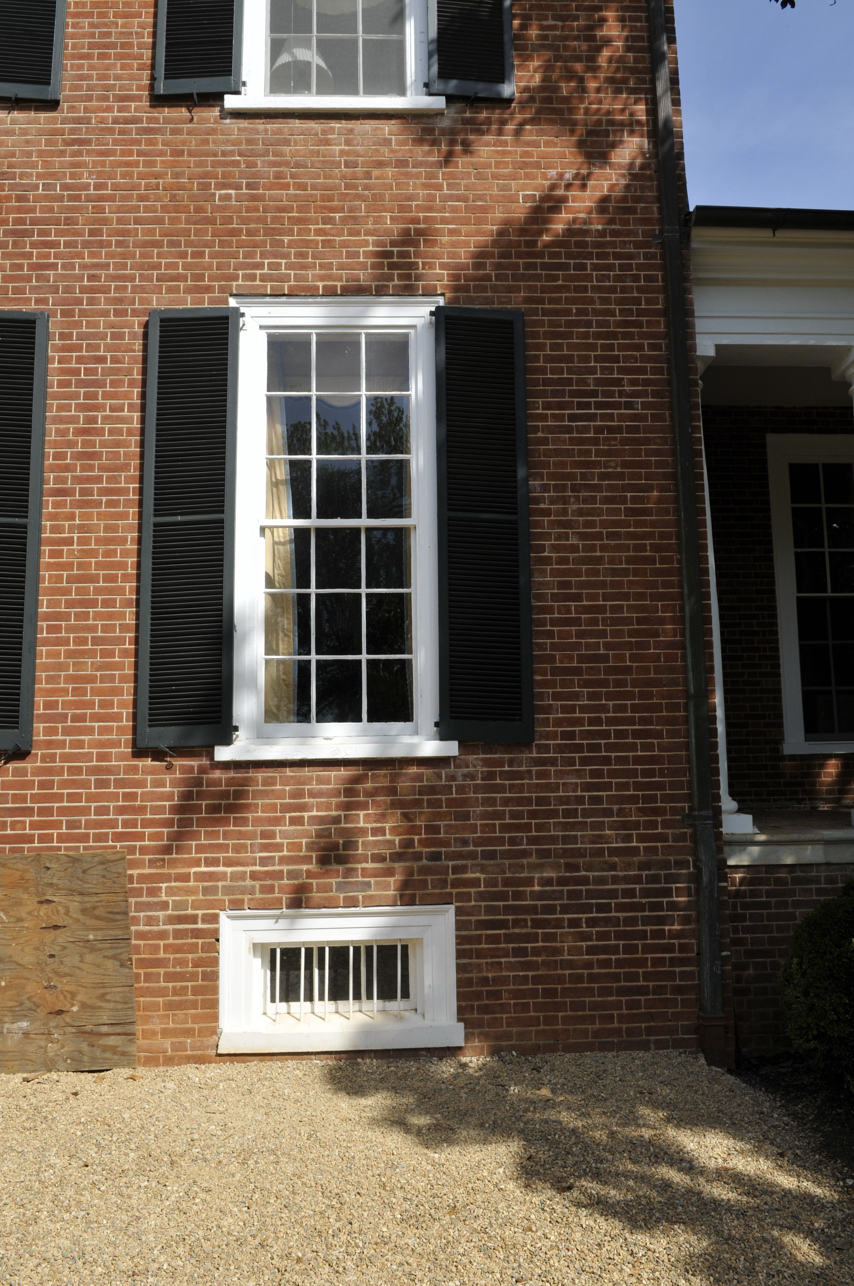
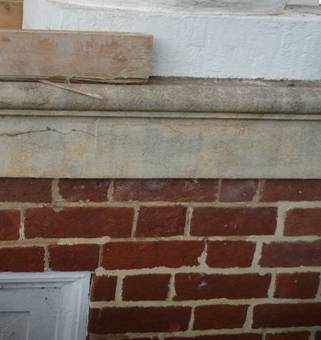
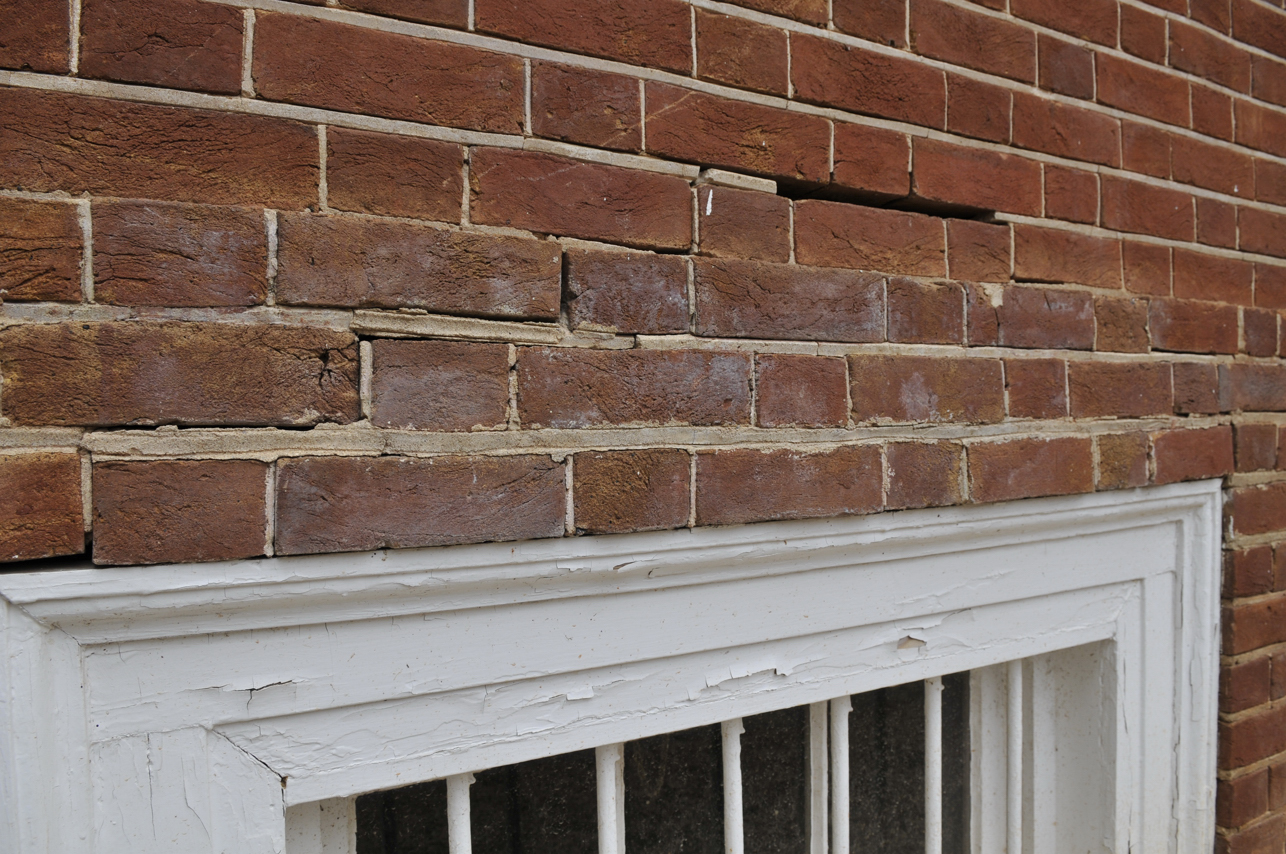
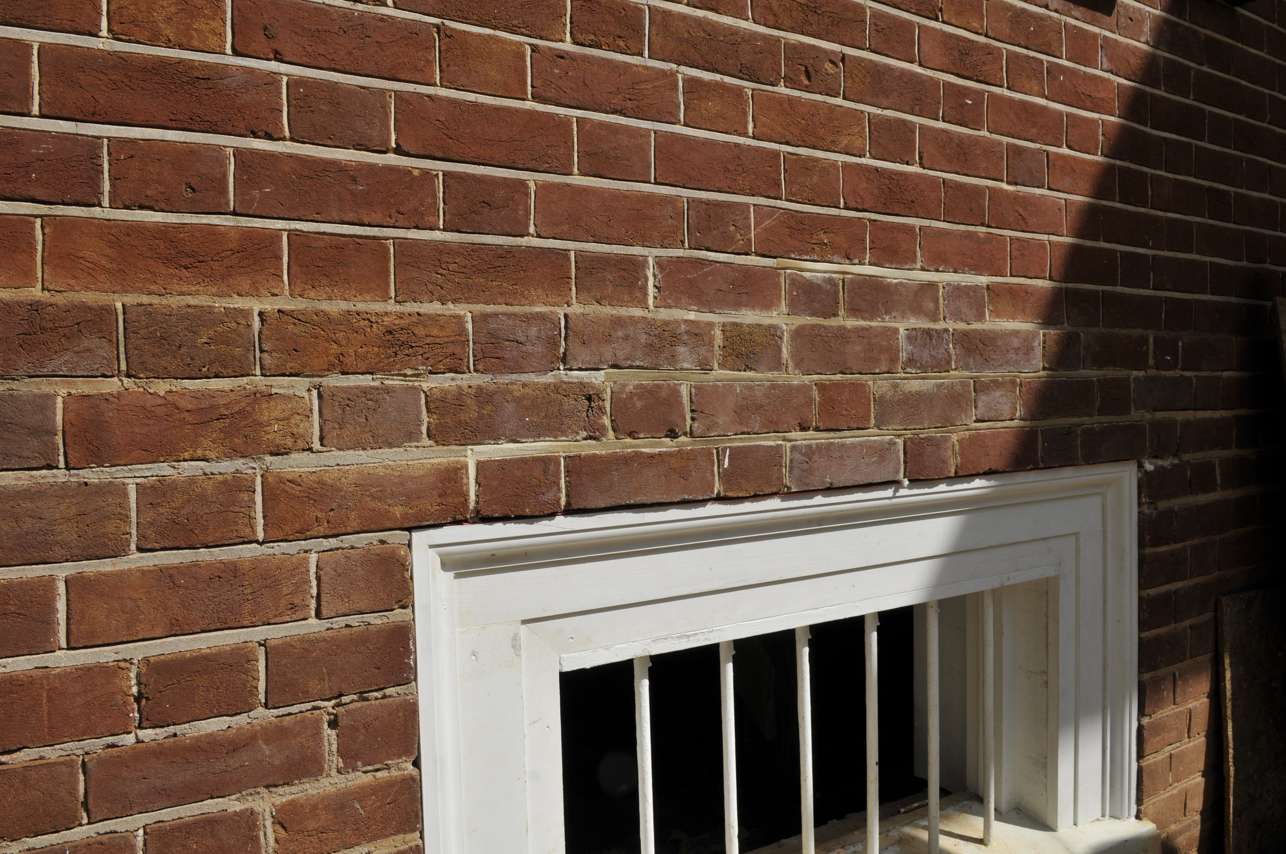
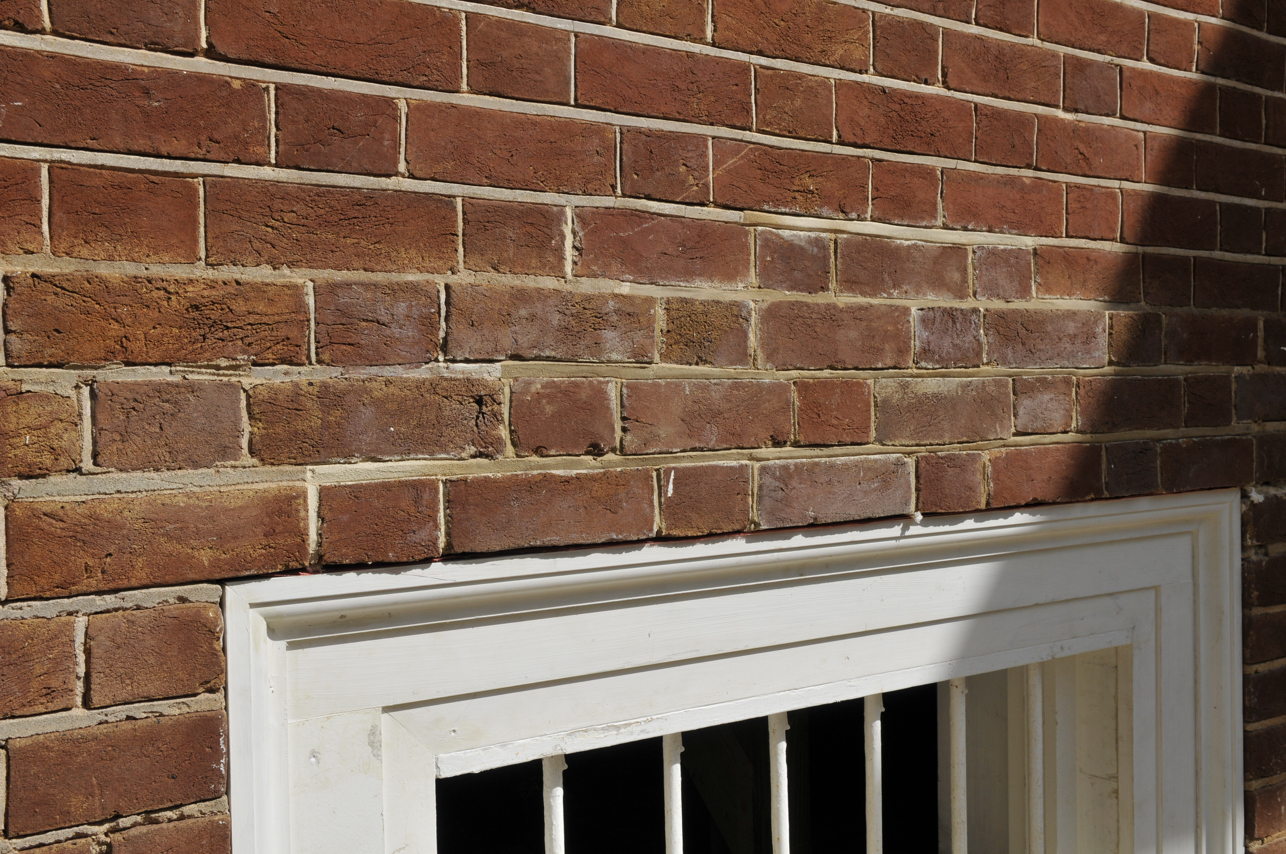
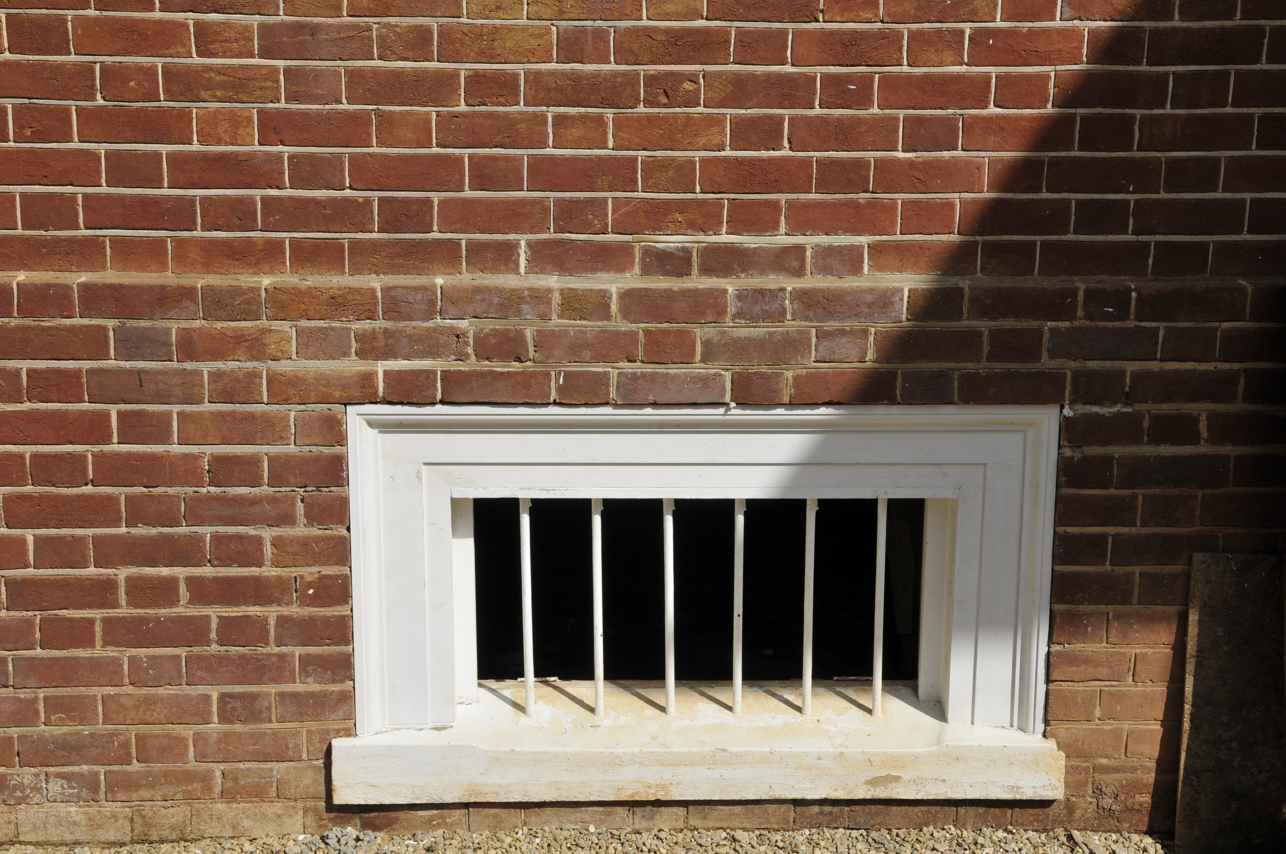
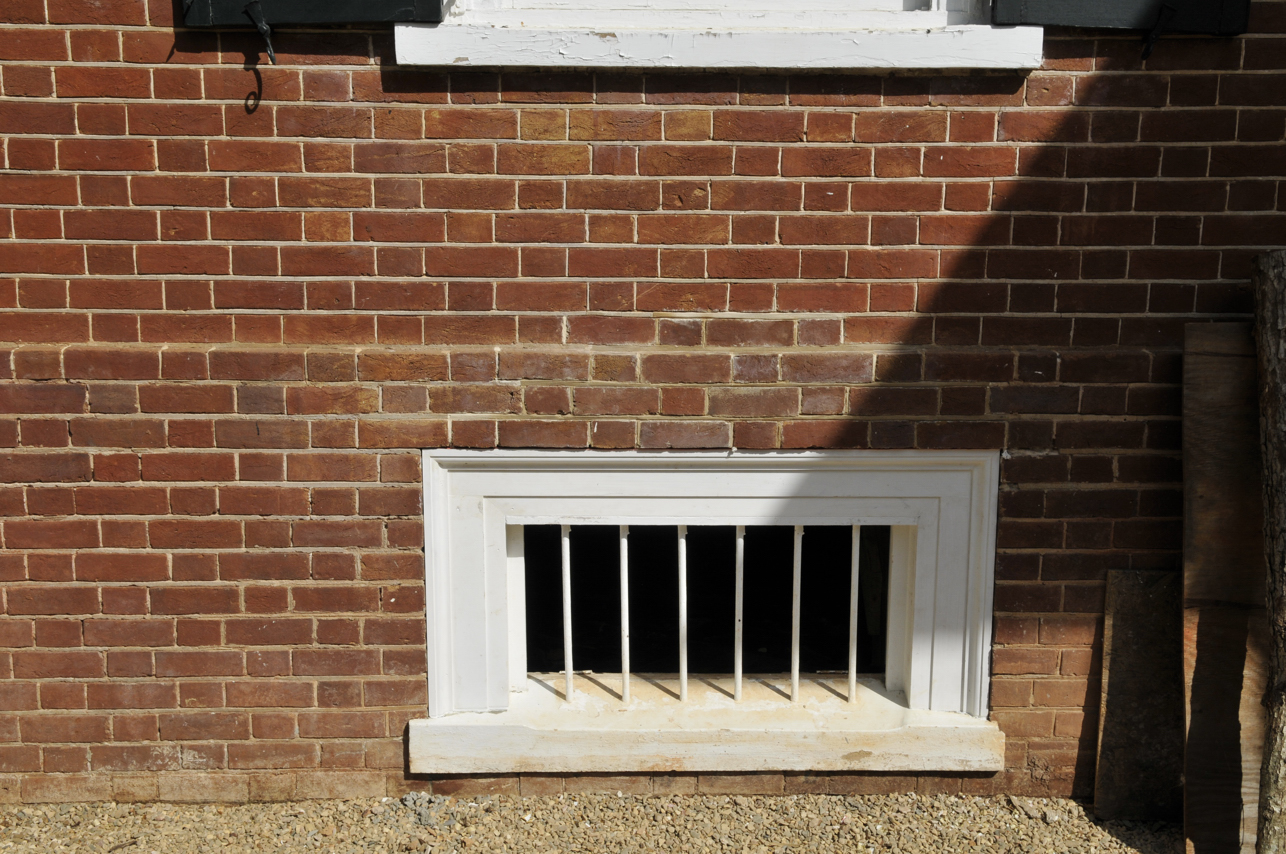
Window E1
Before After


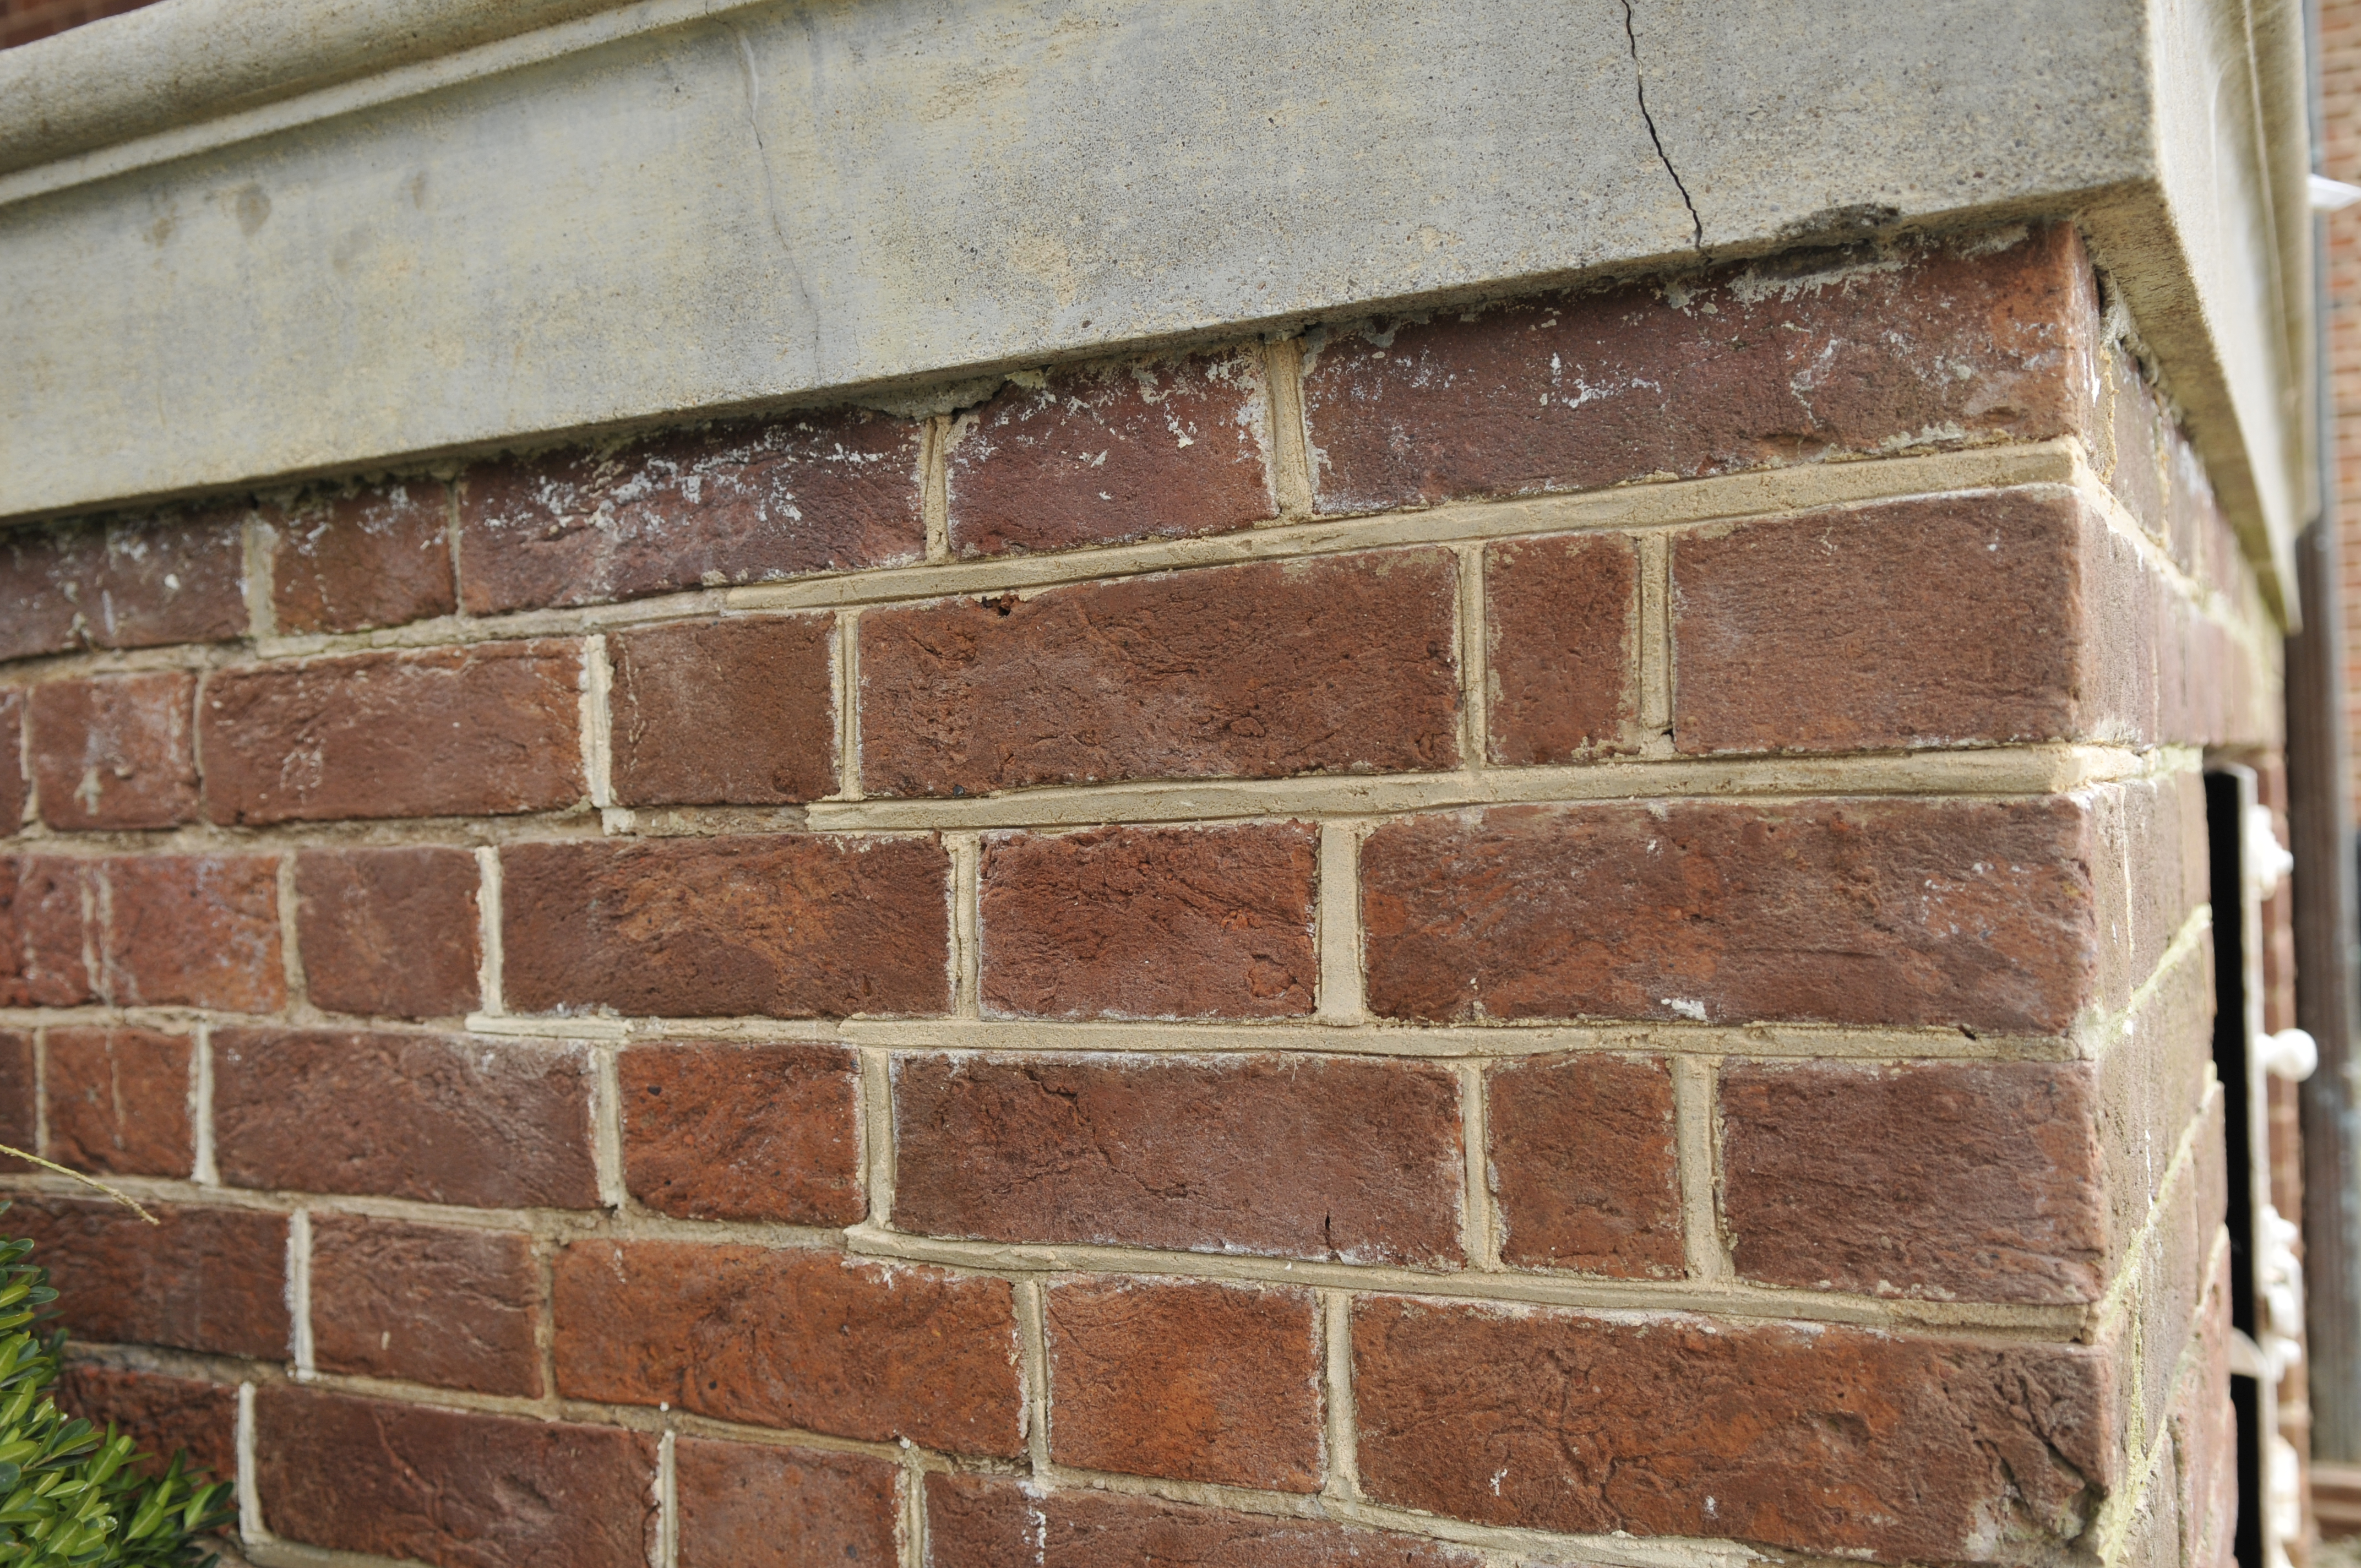
Below are some progress photos taken along the way to show the steps to repair not only the superficial problem but also the deeper structural problem
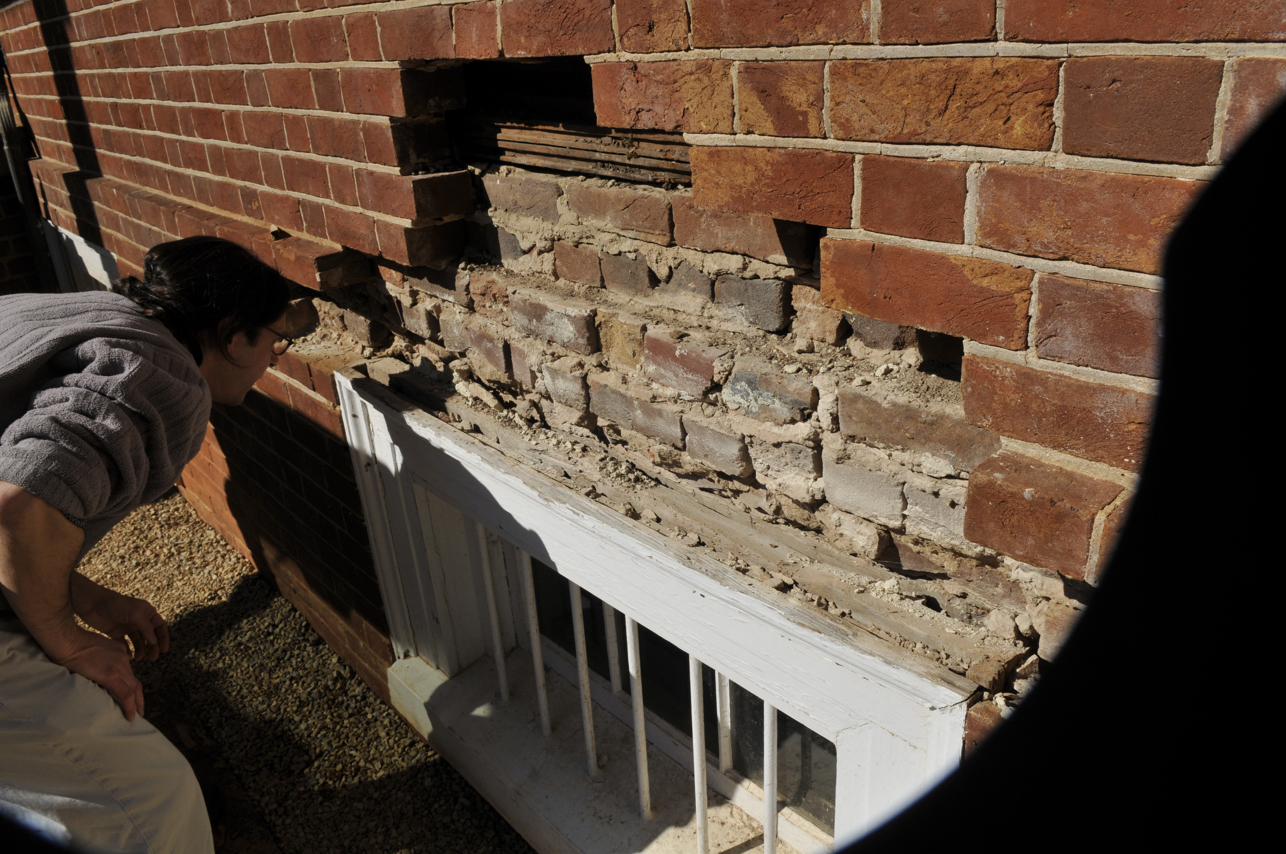
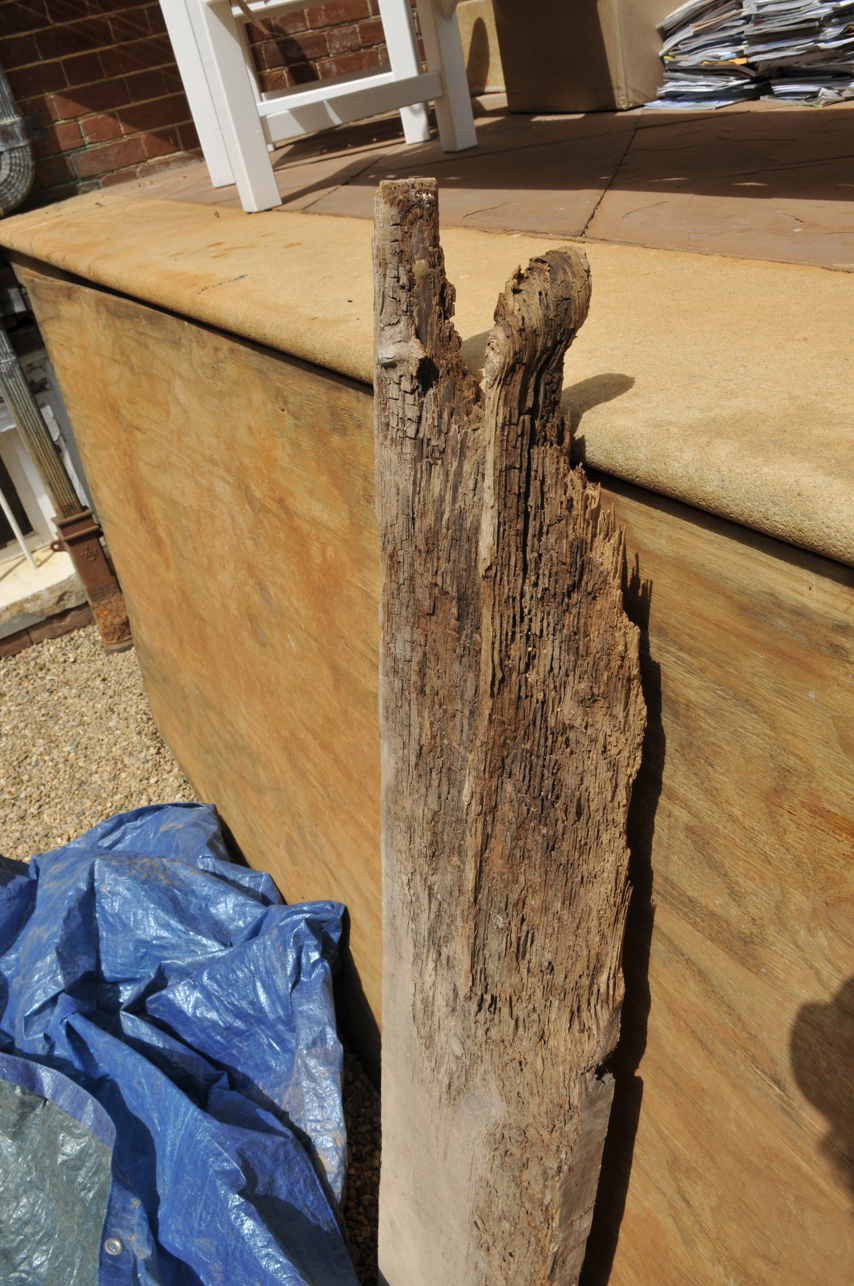
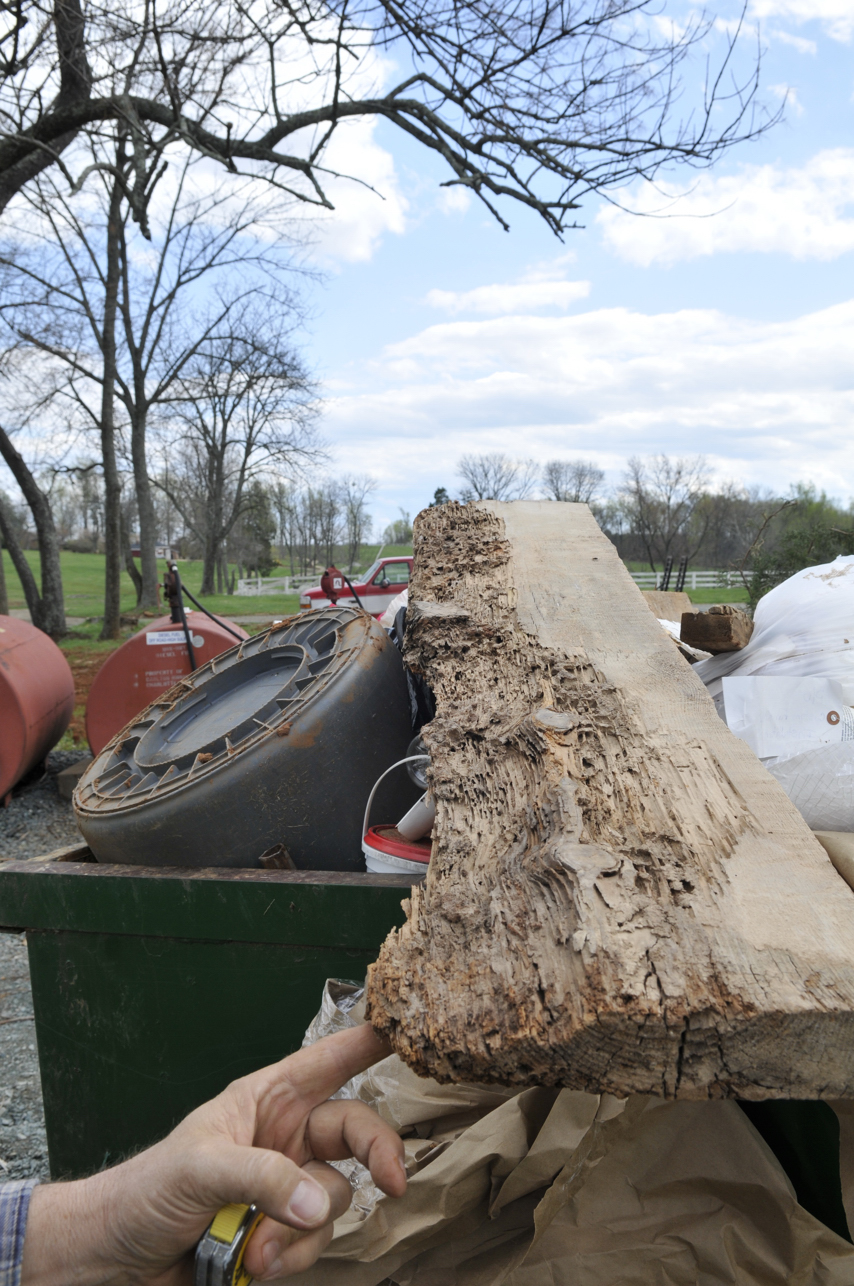
caused by a rotted pine lintel from original construction in 1824. We removed and replaced the rotted lintel in the interior wall with a heart pine sill sawn from a heavy timber
salvaged from a circa 1900 industrial building in Danville, Virginia, provided by Mountain Lumber. The outer wall had originally been supported by the original heart pine
window sill and frame unit, but this had failed by 1948 and had been replaced with a window unit of a different design that included a concrete sill poured in place around the
jambs that supported a lintel, but in the 1948 unit the heavy pine lintel was not actually load bearing, but merely served as something to nail the trim to, and it was actually the
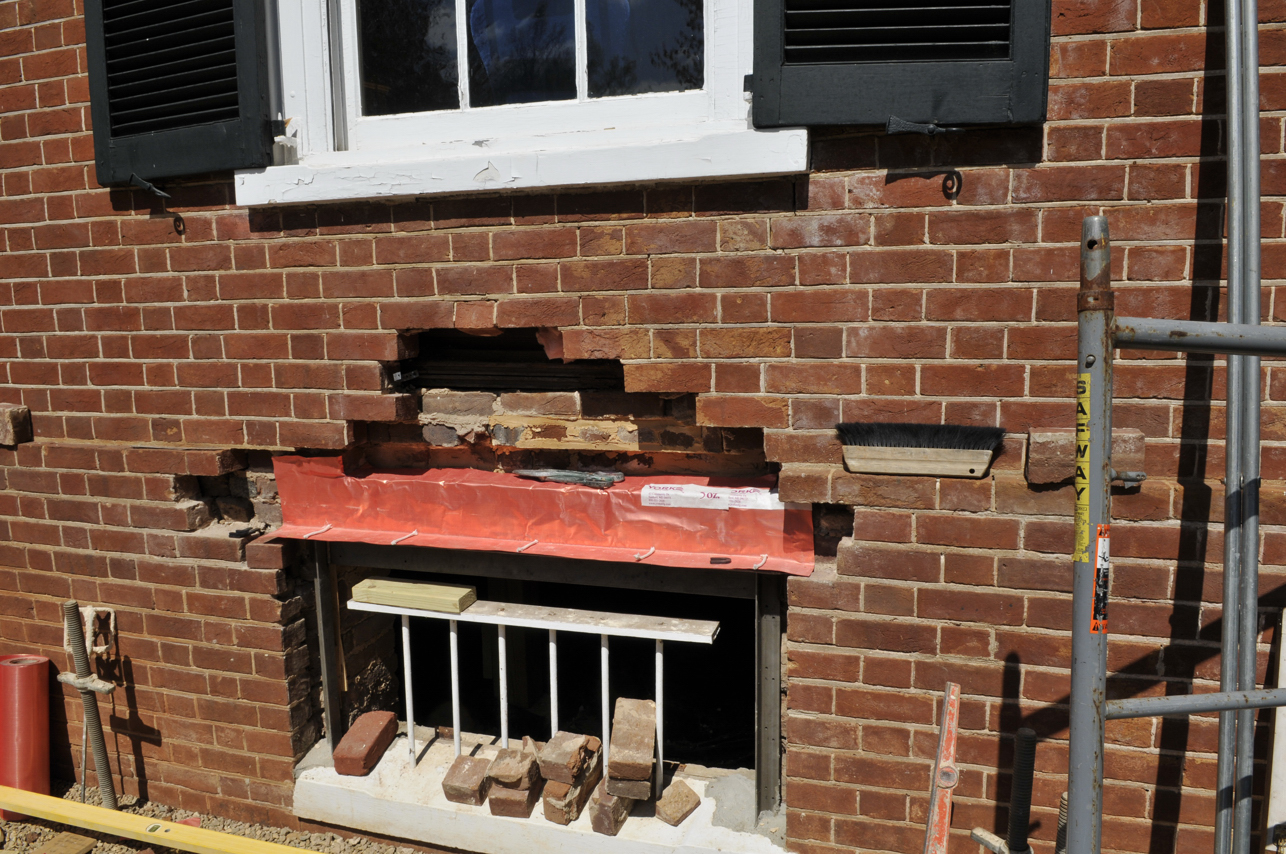
trim that was supporting the brick on the face. We decided to insert a stainless steel lintel unit fabricated for us by Weston Company of Gainesville, Virginia, not let into the brick
walls where it might not be compatible with the historic brick work, but, rather, supported by stainless steel legs that went into the voids left when we removed the rotted 1948
jambs from the concrete that had been poured around them. When we had the stainless steel positioned correctly to support the bricks over the window, we poured fast setting
anchor cement around the stainless steel legs and then installed York Flashing and weep ropes before re-setting the bricks we had removed from an unseen wall in the basement
that was part of the 1824 building later surrounded by the 1840 addition. The bricks we removed (and replaced with other similar historic bricks from other sources) were original
1824 face brick exactly matching the original face bricks on the front facade. We had to find replacement bricks because some of the original bricks were too damaged by an earlier
repair to be used again as face bricks and also because not all of the bricks used in the earlier repair were original face bricks but, rather, were actually modern extruded wire cut
brick that did not match at all, neither for color nor for dimension. The carpenter completed the work by attaching the jambs and casing to the stainless steel appliance that had
been pre-drilledfor this purpose.
Click on any of these:


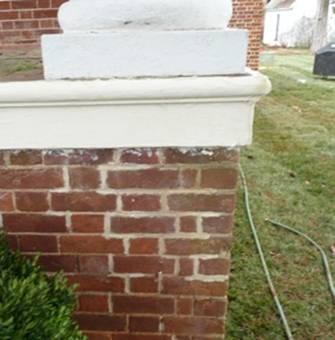
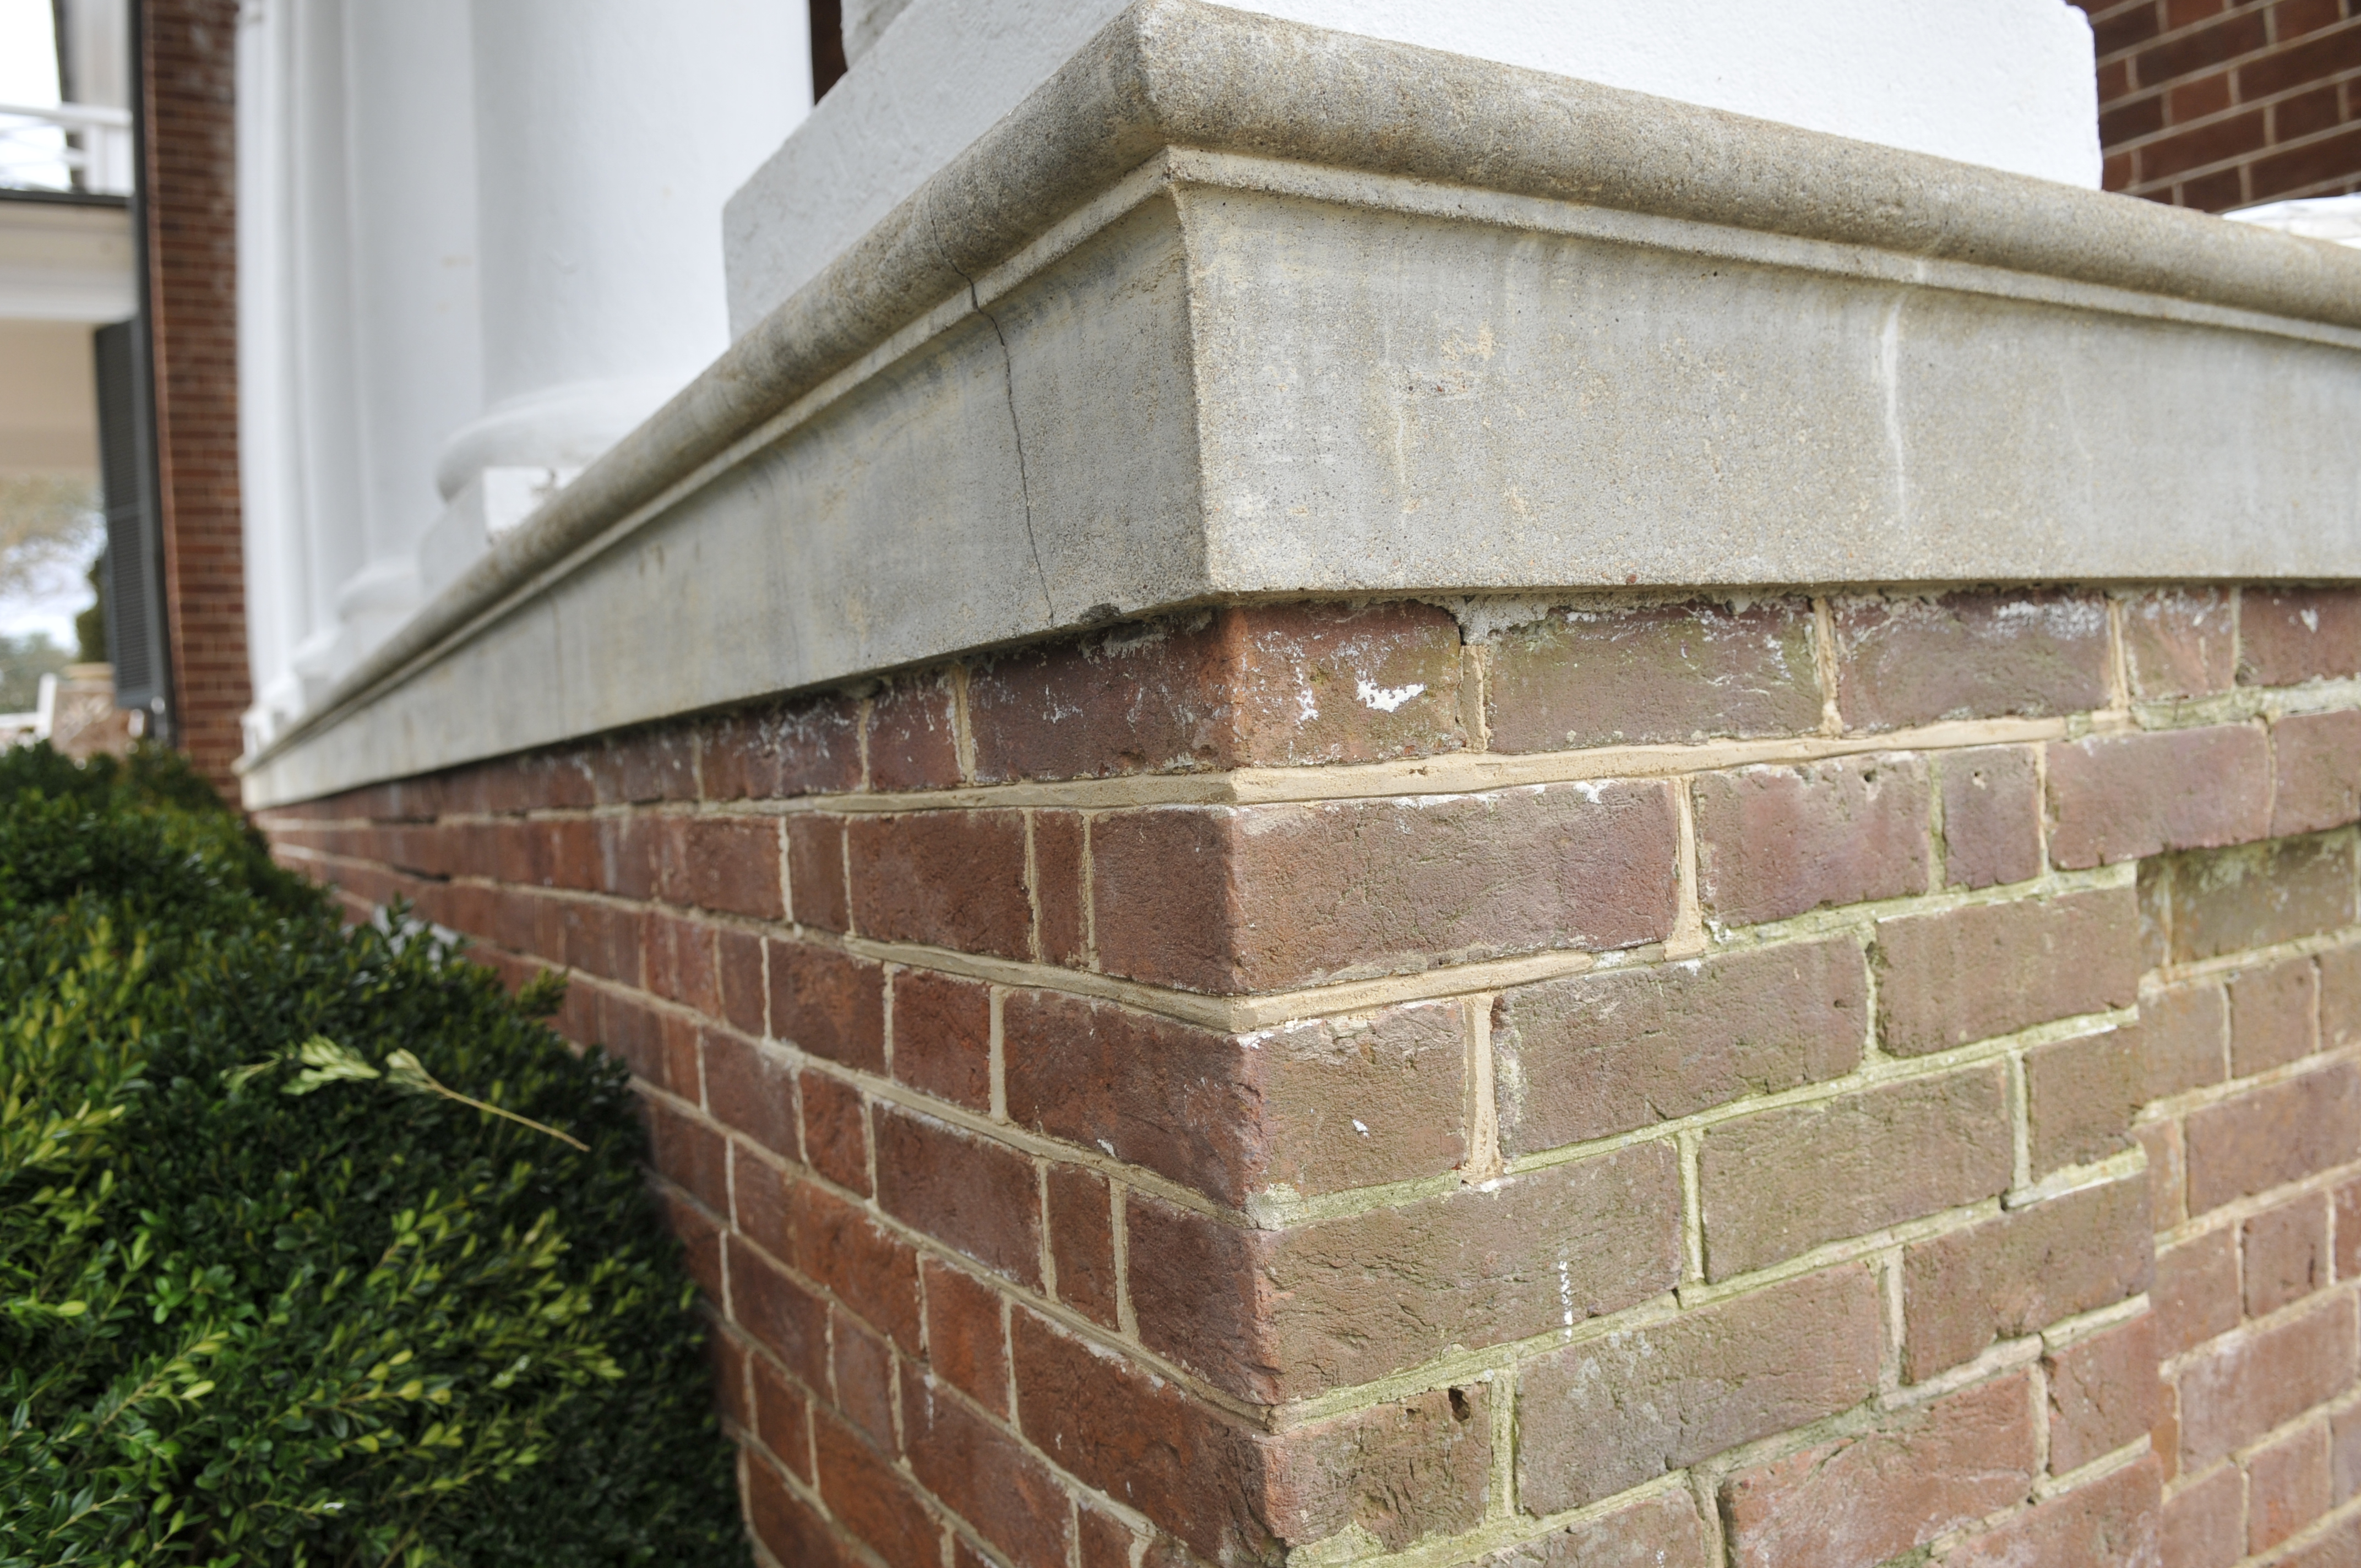
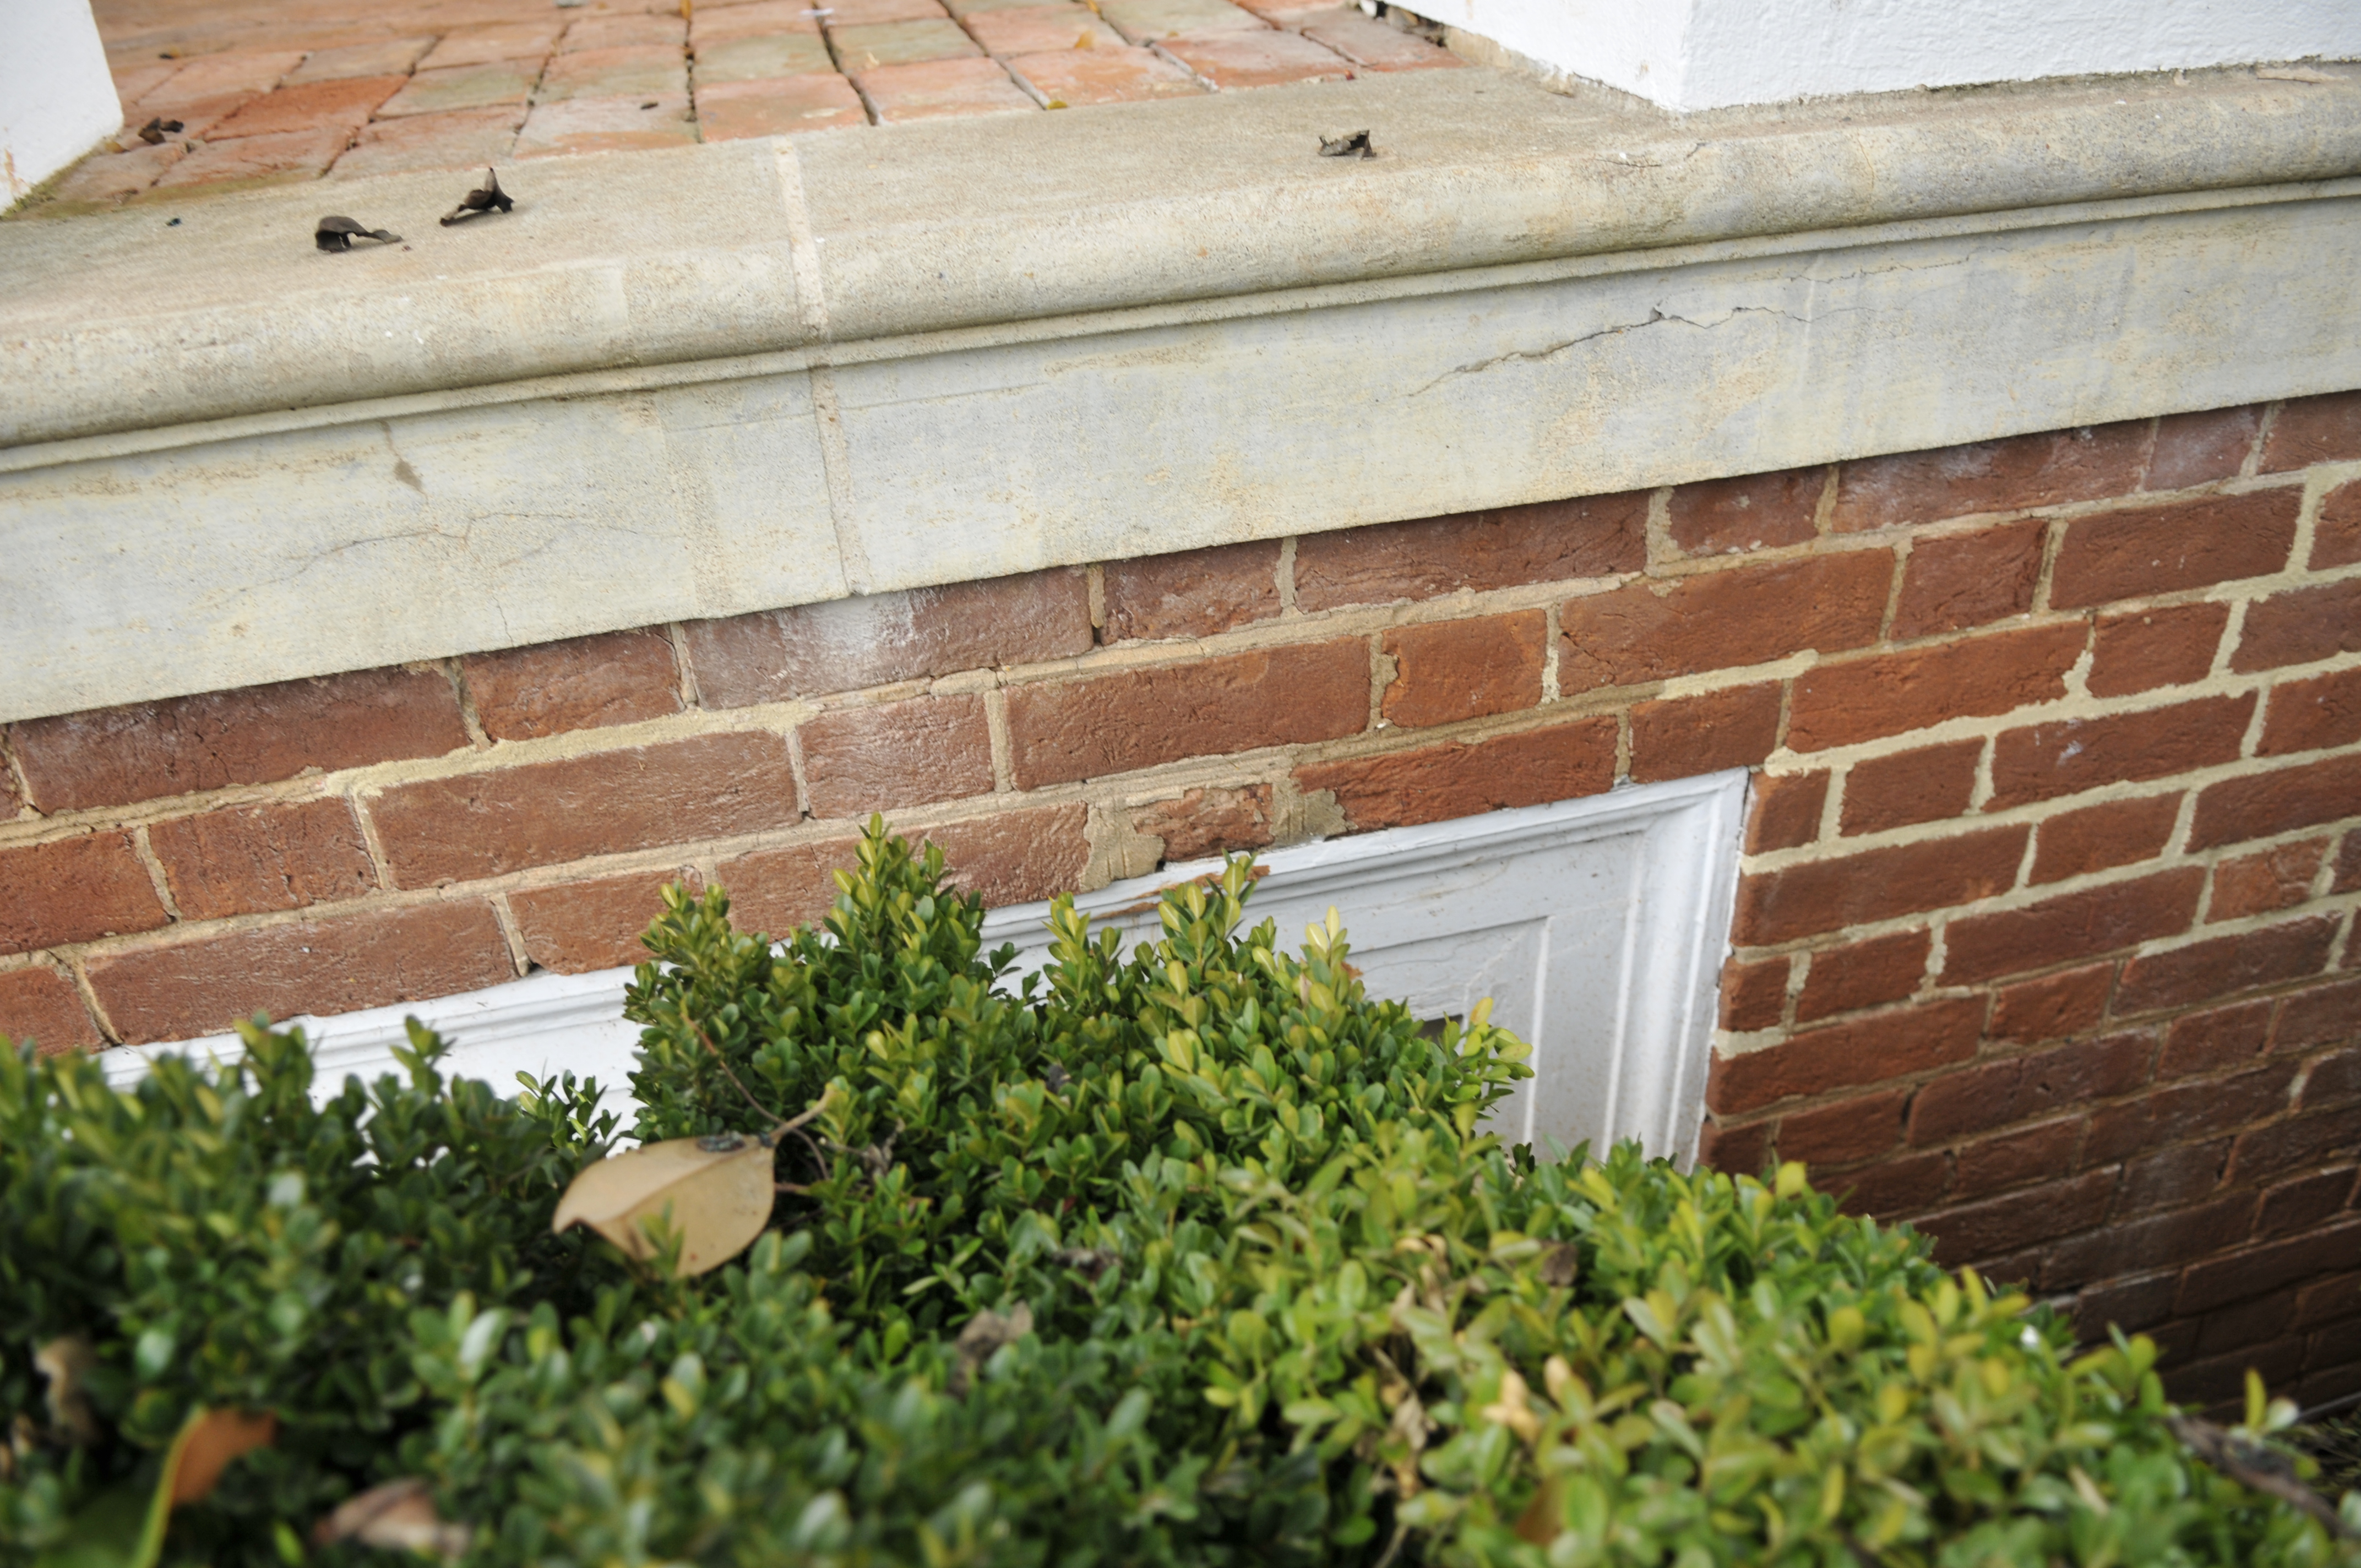
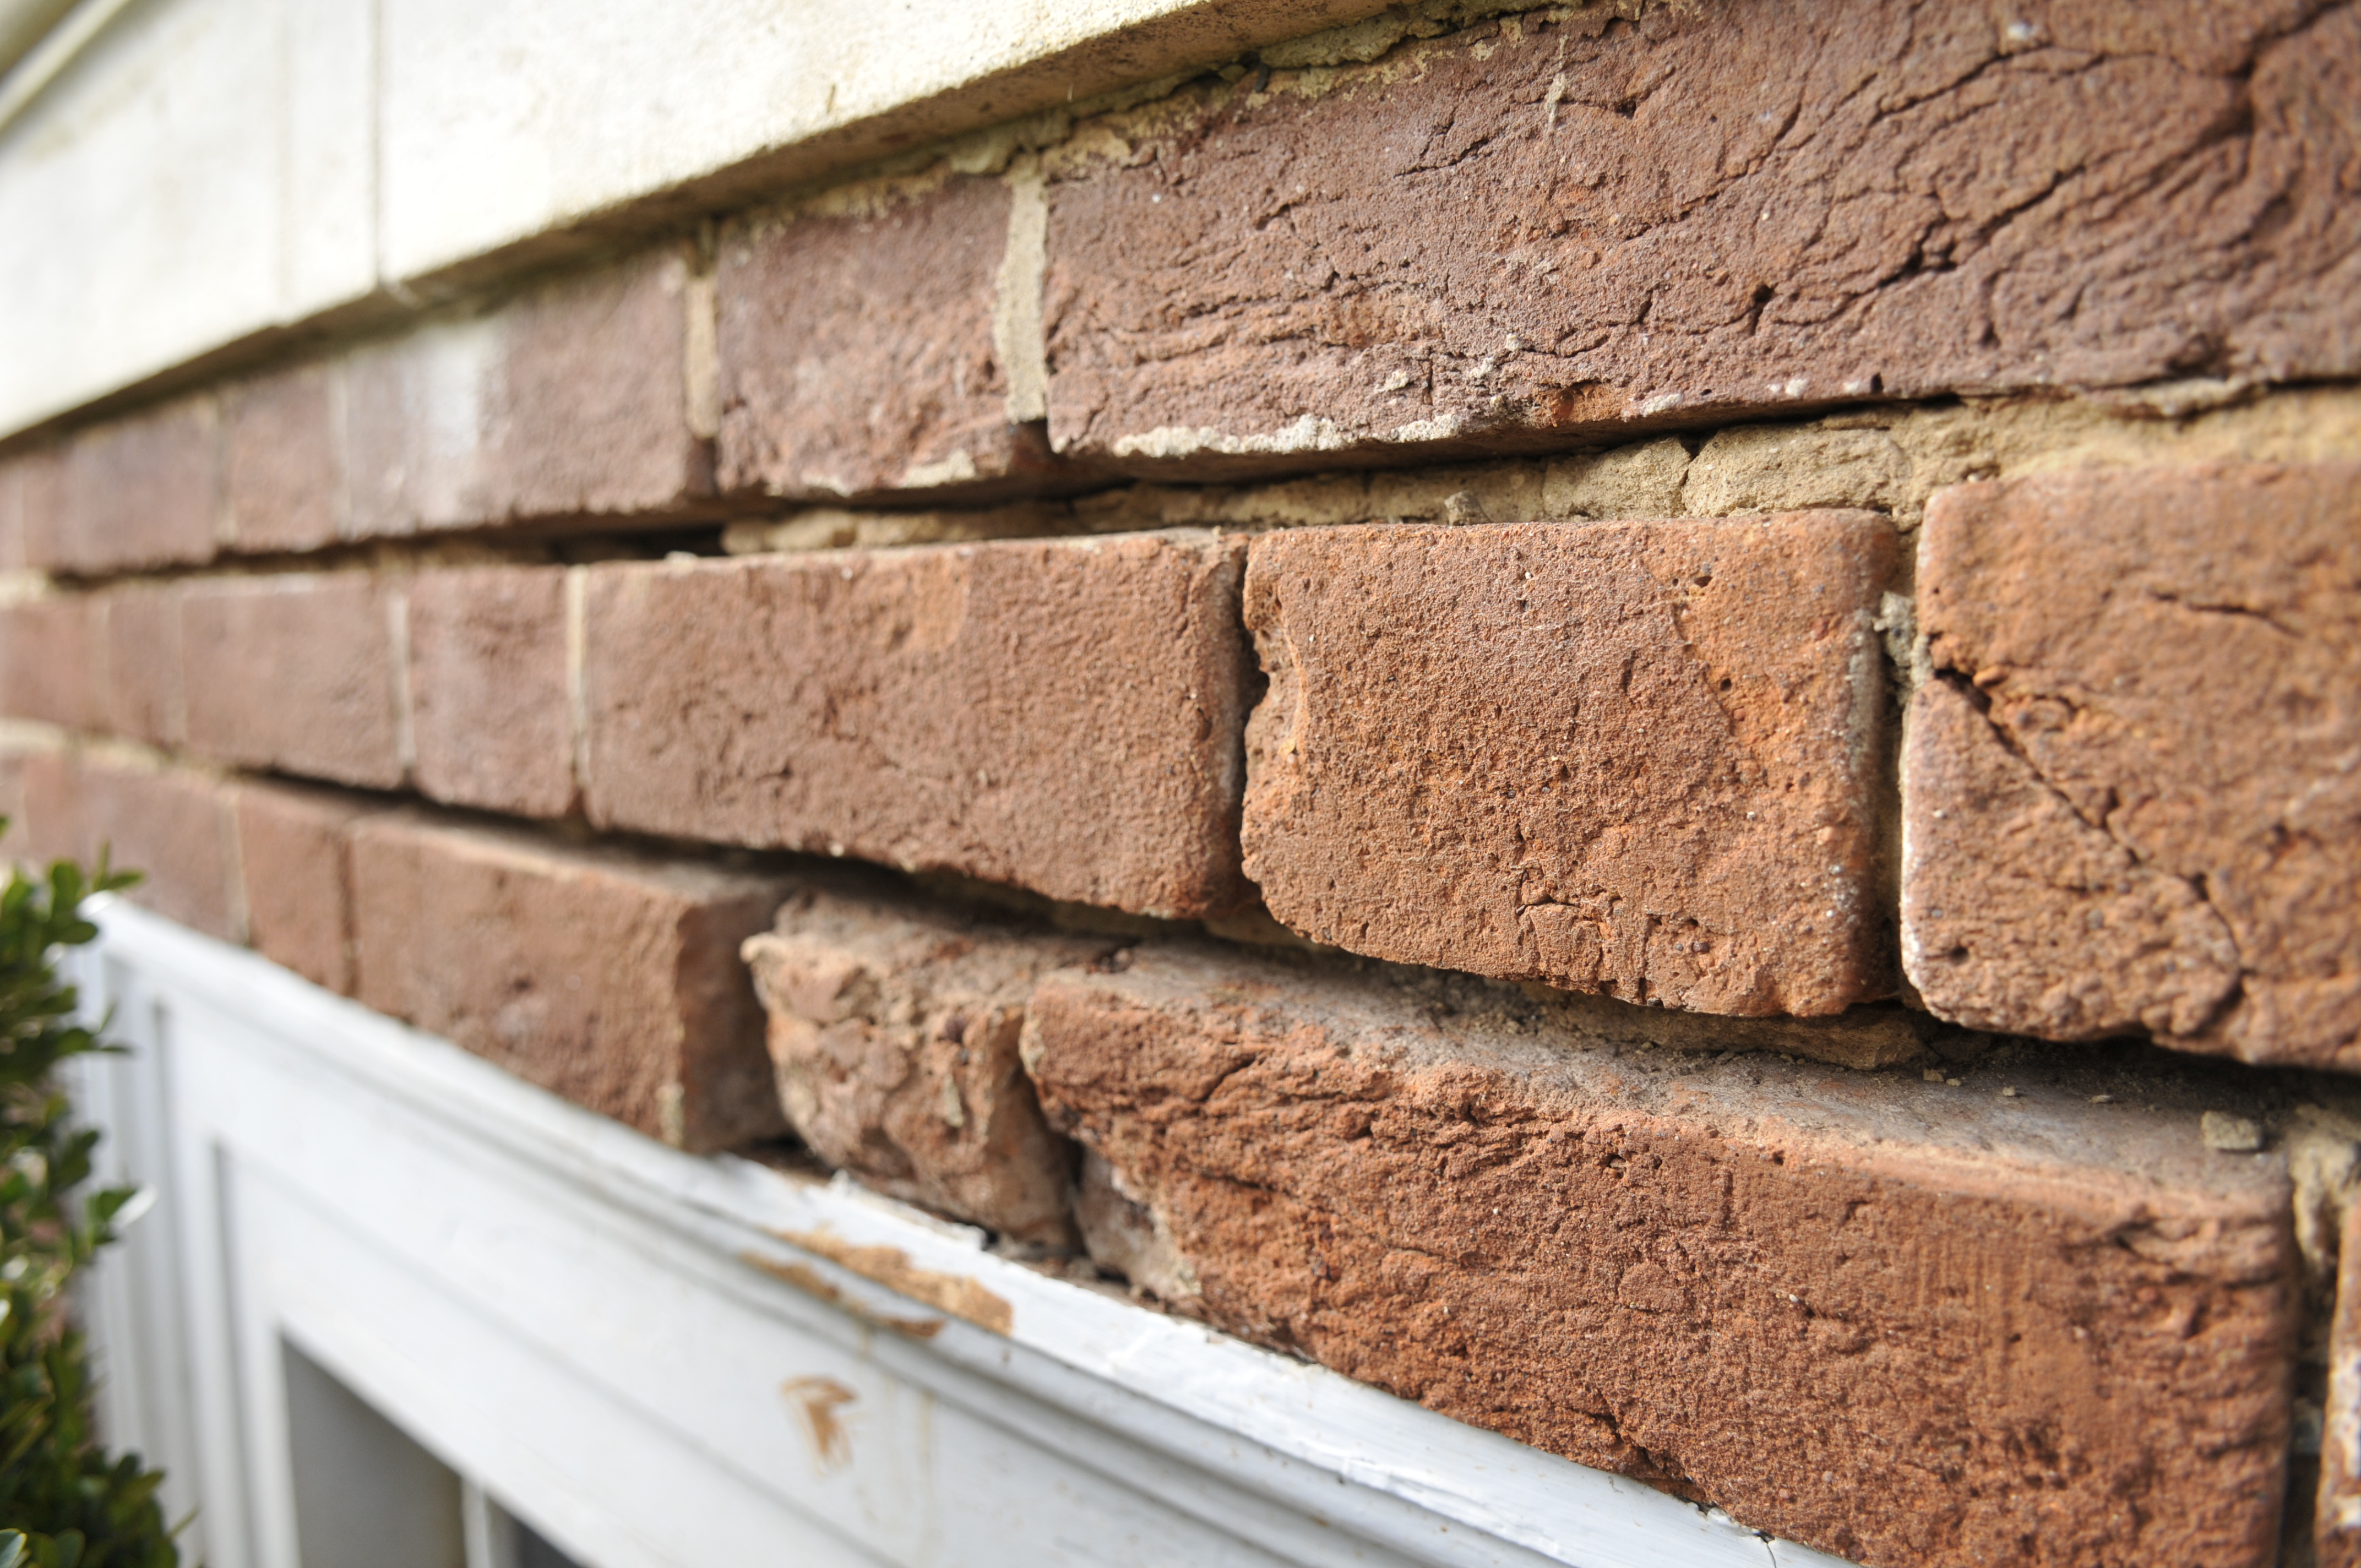
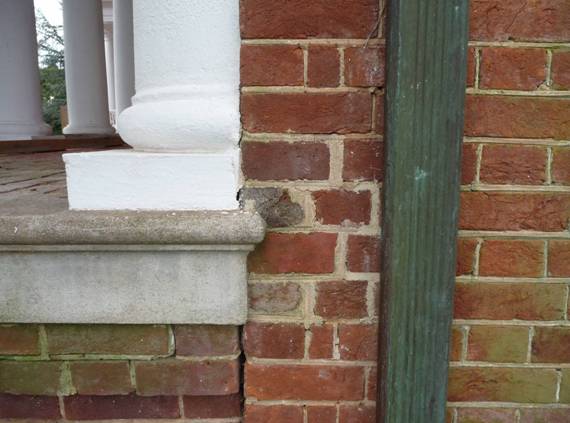
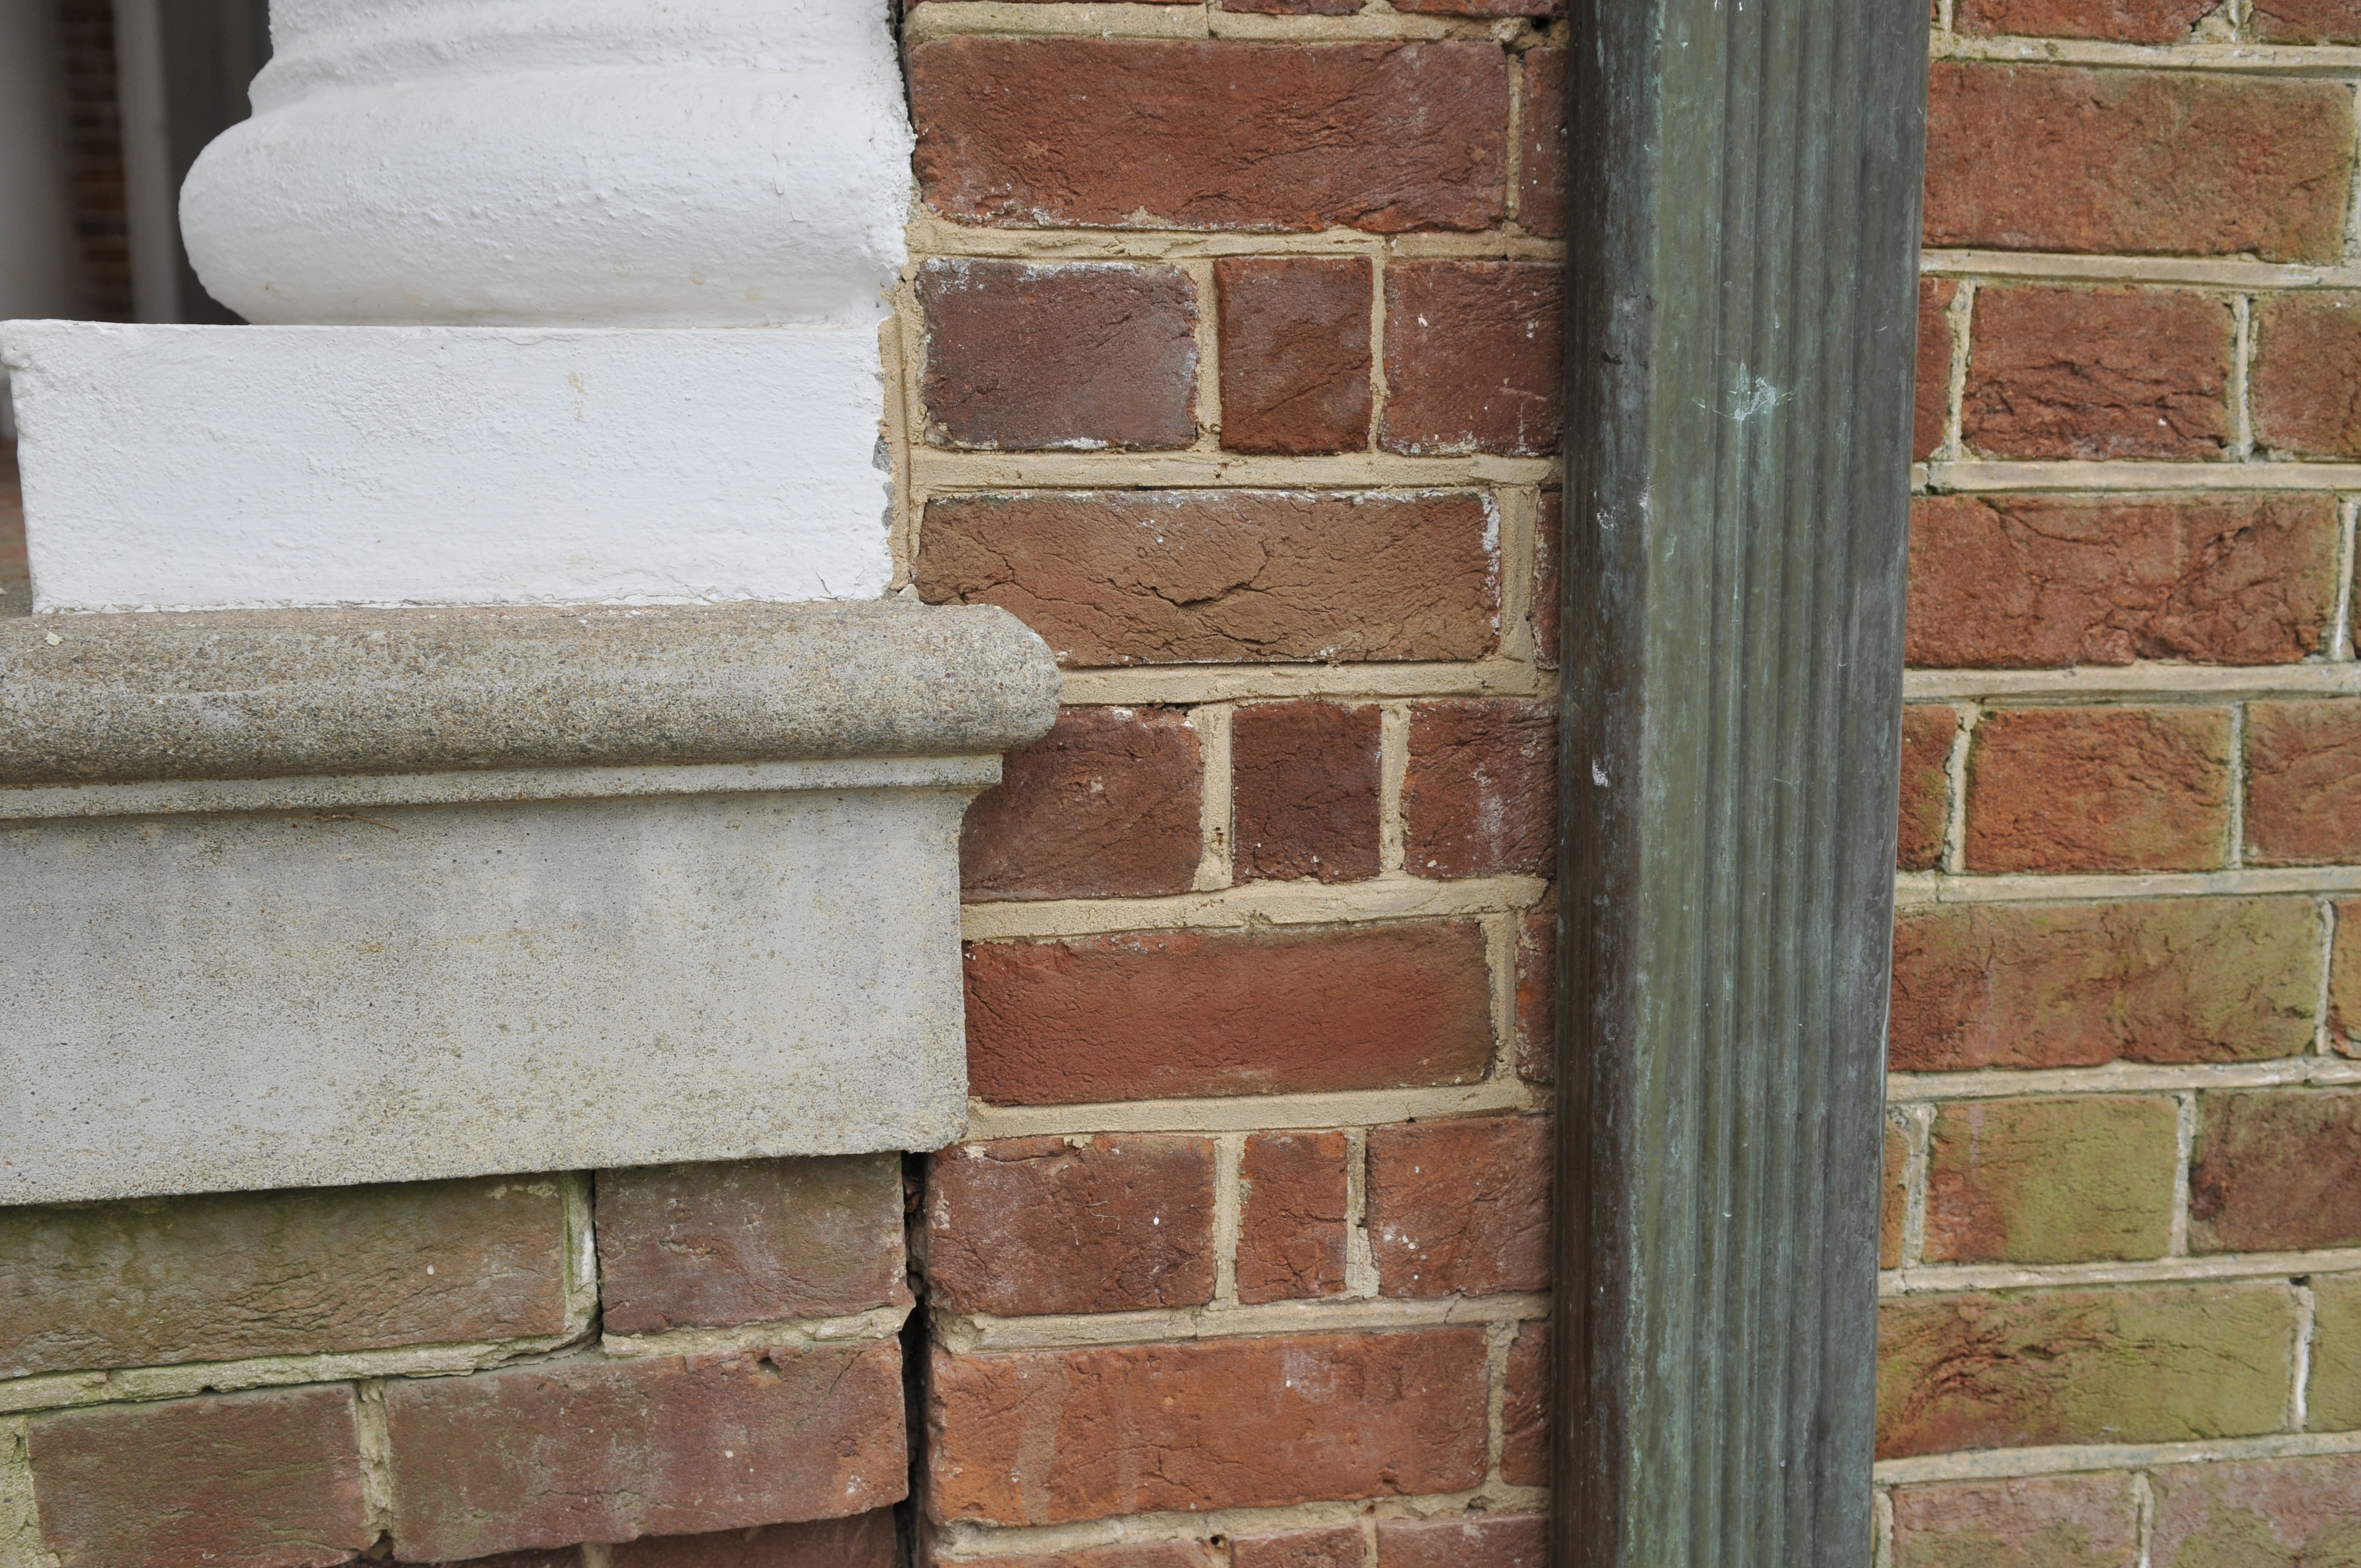
Corner at the North Porch
Earlier repairs resulted in an unsatisfactory appearance, seen in the first image on left. We removed
the inappropriate mortar and replaced it with a closer color match and tooling and then used
some water soluble natural pigments to blend the area into the surrounding weathered mortar,
seen in the lower photos.
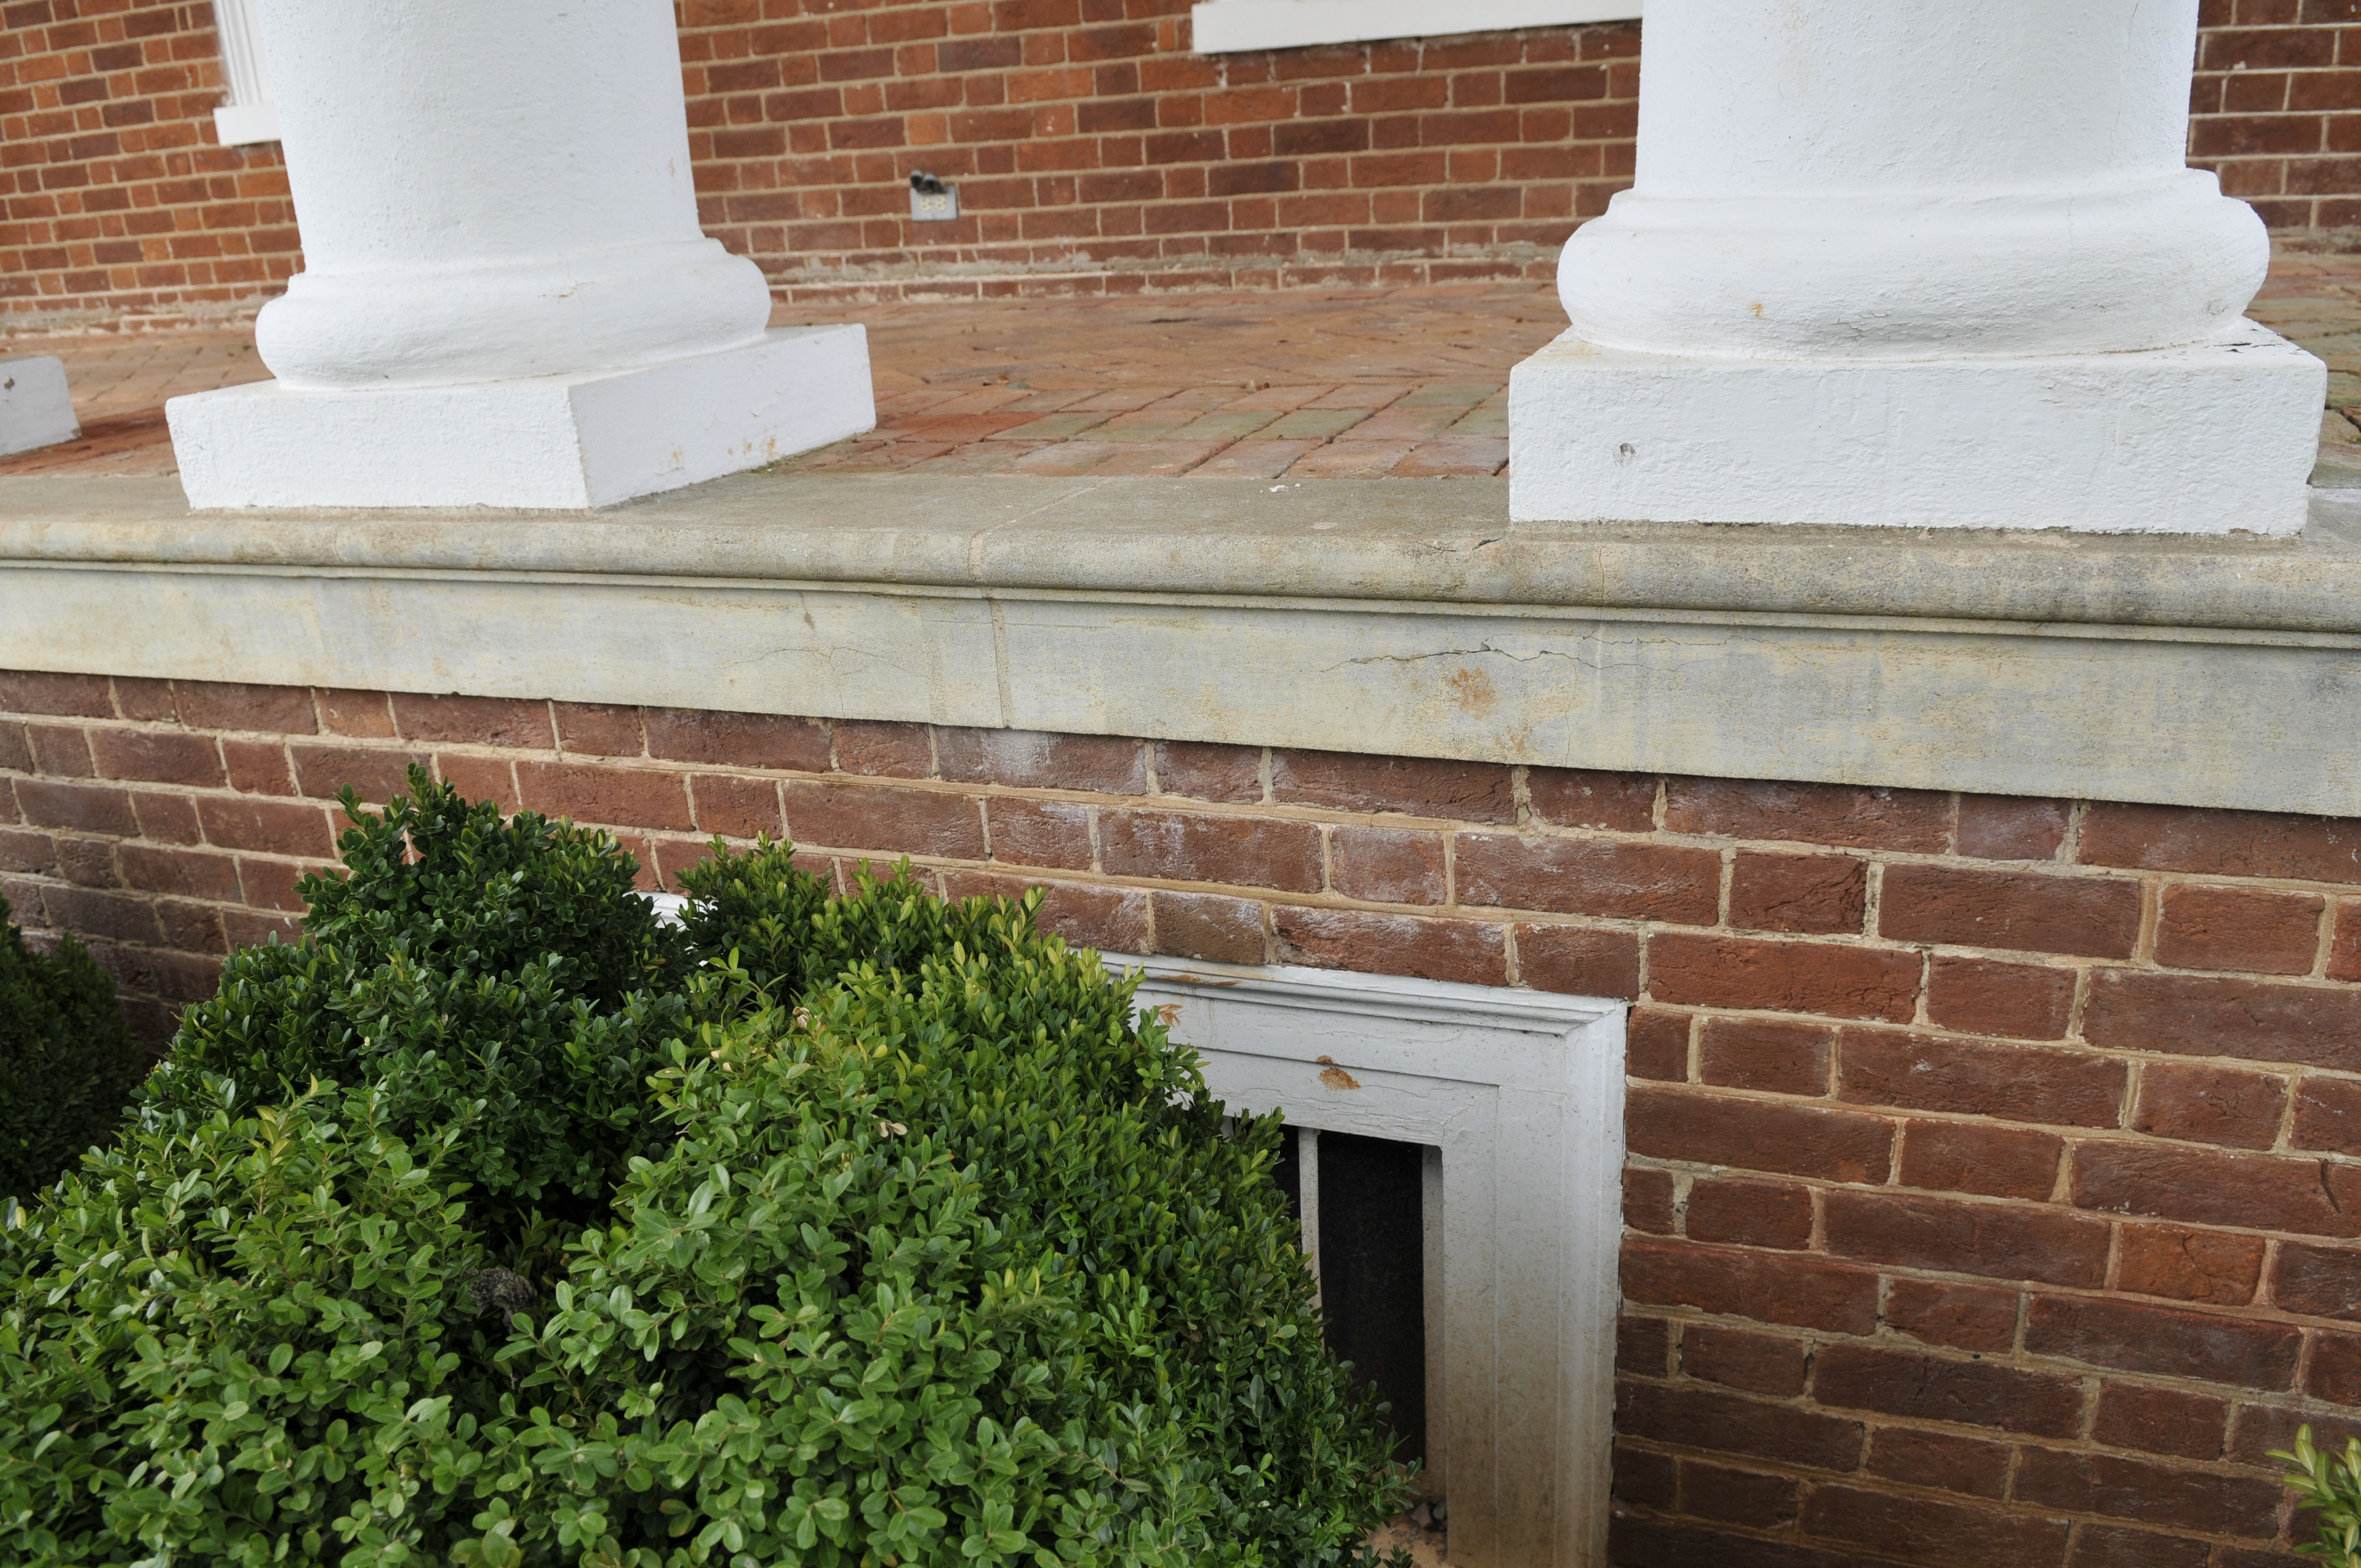
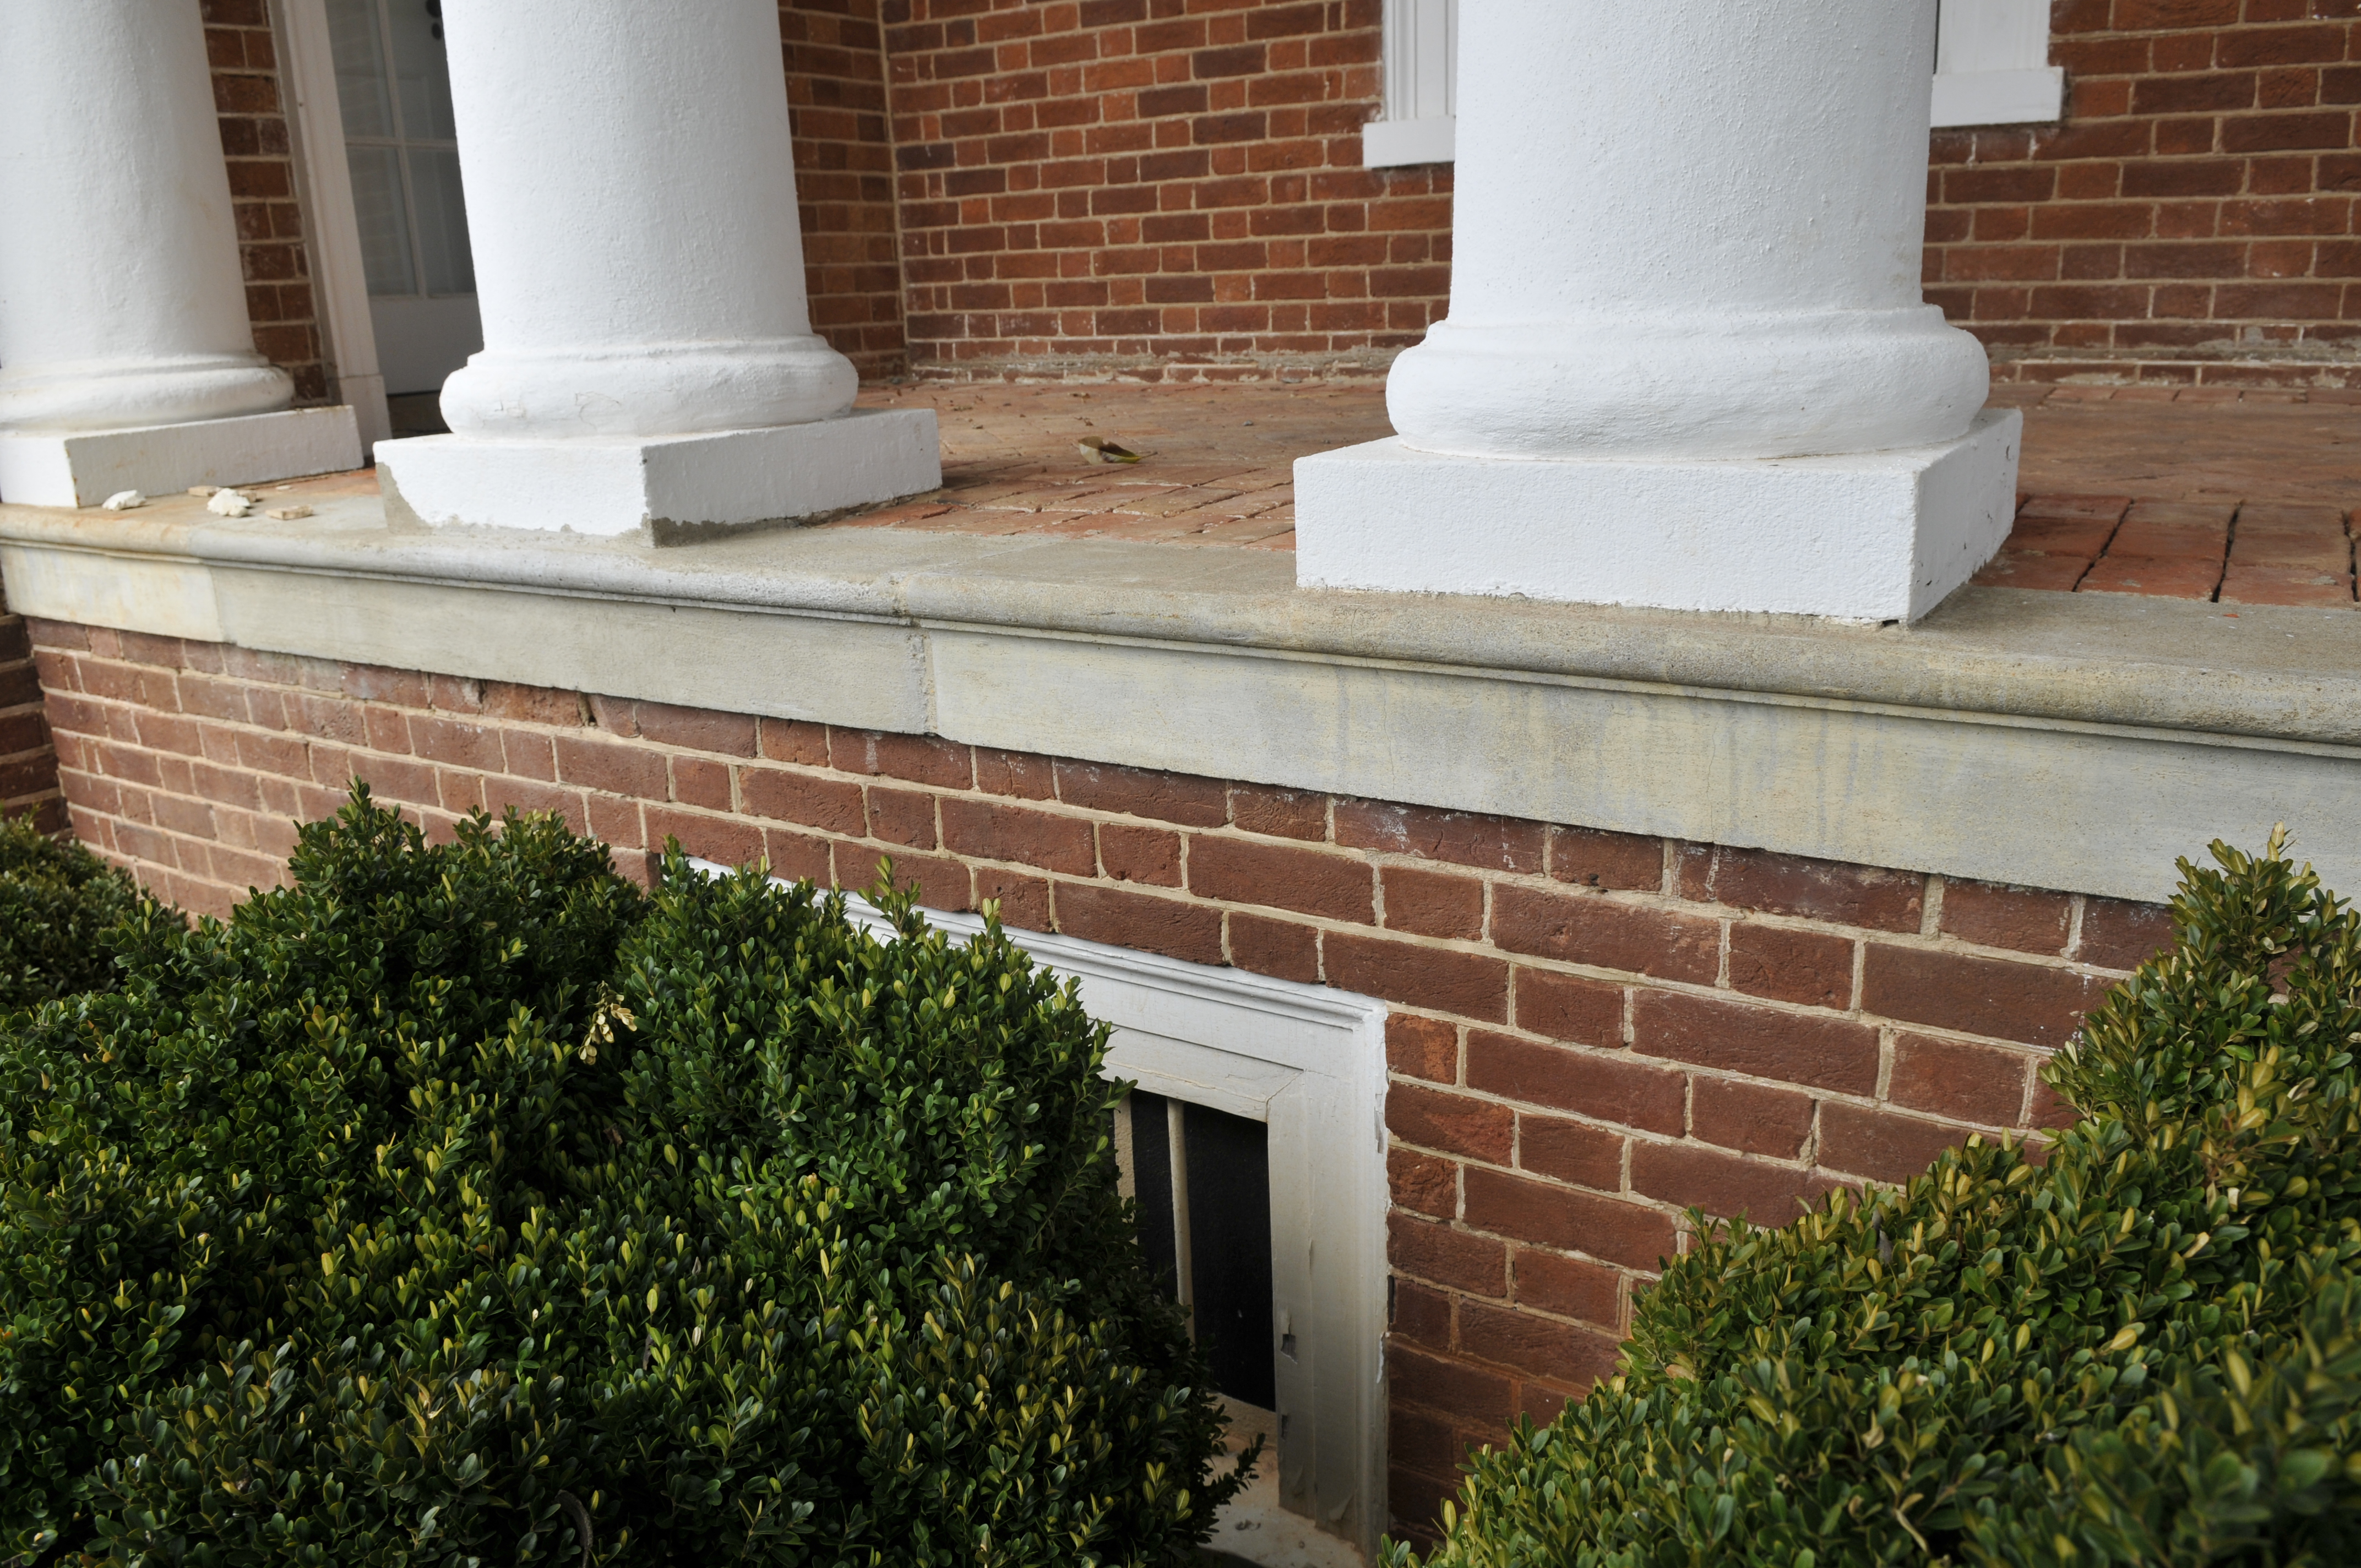
North Porch Facade
Earlier repointing resulted in an unsatisfactory appearance as seen in these two images below.
We removed the inappropriate mortar, seen in progress below, and replaced it with traditional
mortar more closely matching the original in color and tooling.
This was the finished result, below:
And this the finished result at the next window to the left, below:
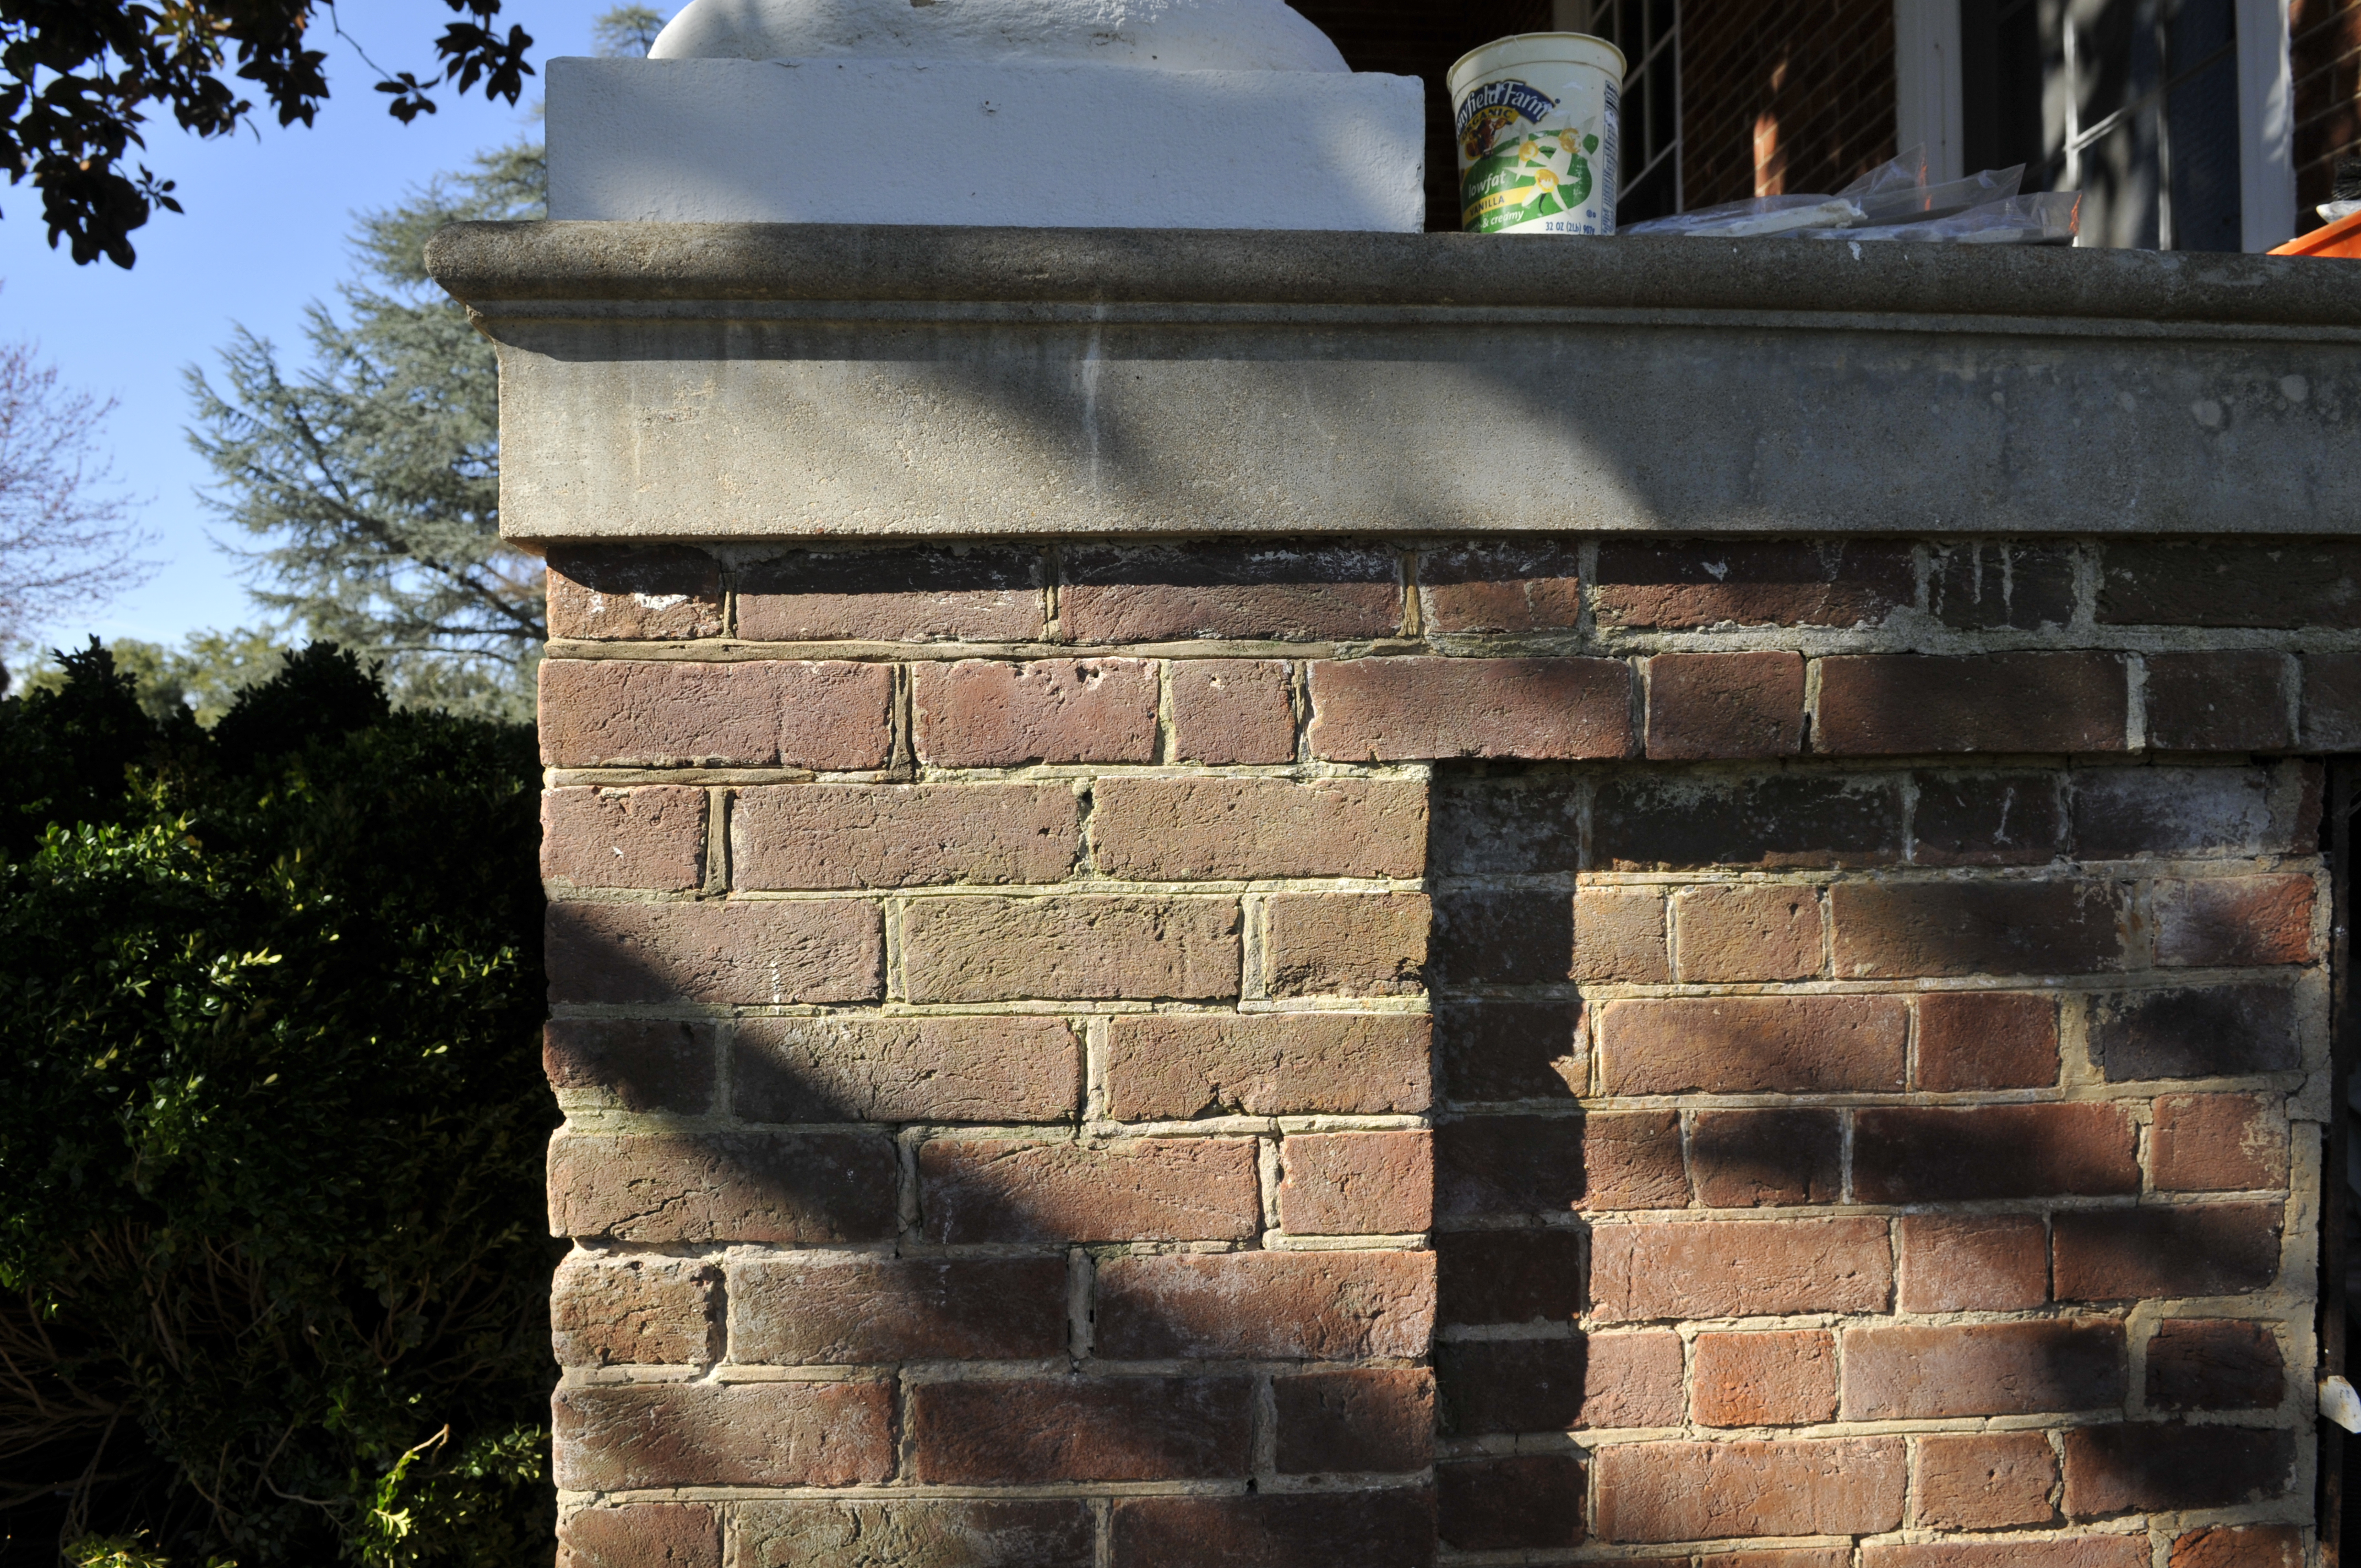
North Conservatory Wall
There had been some inappropriate brick replacement from the 1948 project that we corrected by replacing the bricks to correspond with the Flemish Bond pattern and with
mortar more closely resembling the original in color and tooling. Then we applied some water soluble natural pigments to blend the area in to the surrounding weathered patina,
as seen in the lower image.

Failure of the supporting structure resulted in the collapse of the bricks over the window opening.
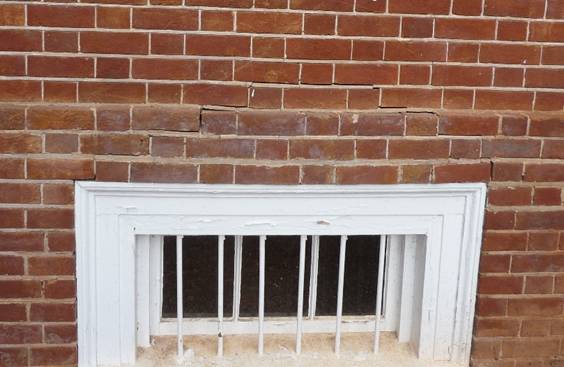
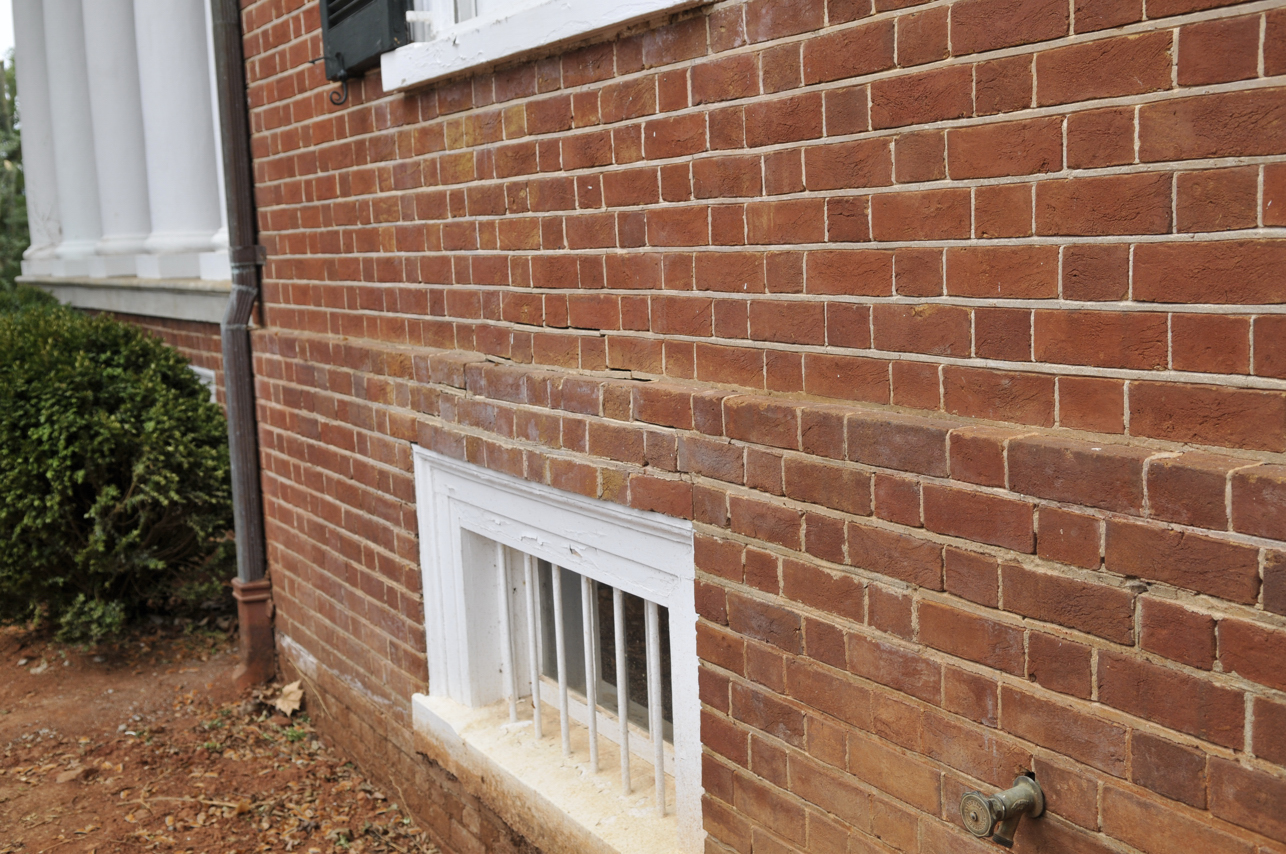
As at window E1, we had to remove the area of collapse at the facade and also replace the badly rotted interior pine lintel from 1824. This required the removal
of the brick above the lintel, exposing the joist ends. The joists had earlier been supported by a new heavy treated lumber girder to take the load off the brick wall
so that we could remove the supporting lintel and brick. The new girder will remain in place to provide supplemental support to the old floor joists.
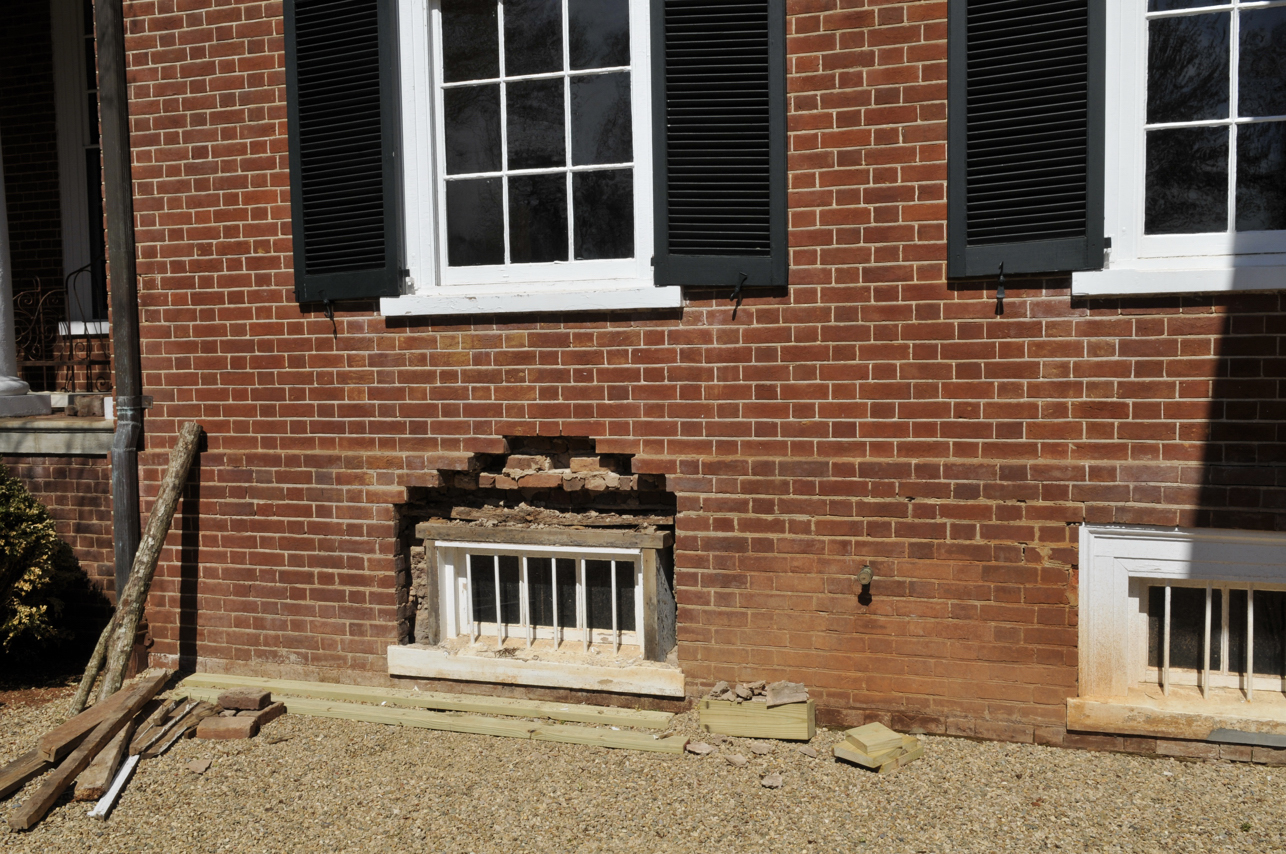

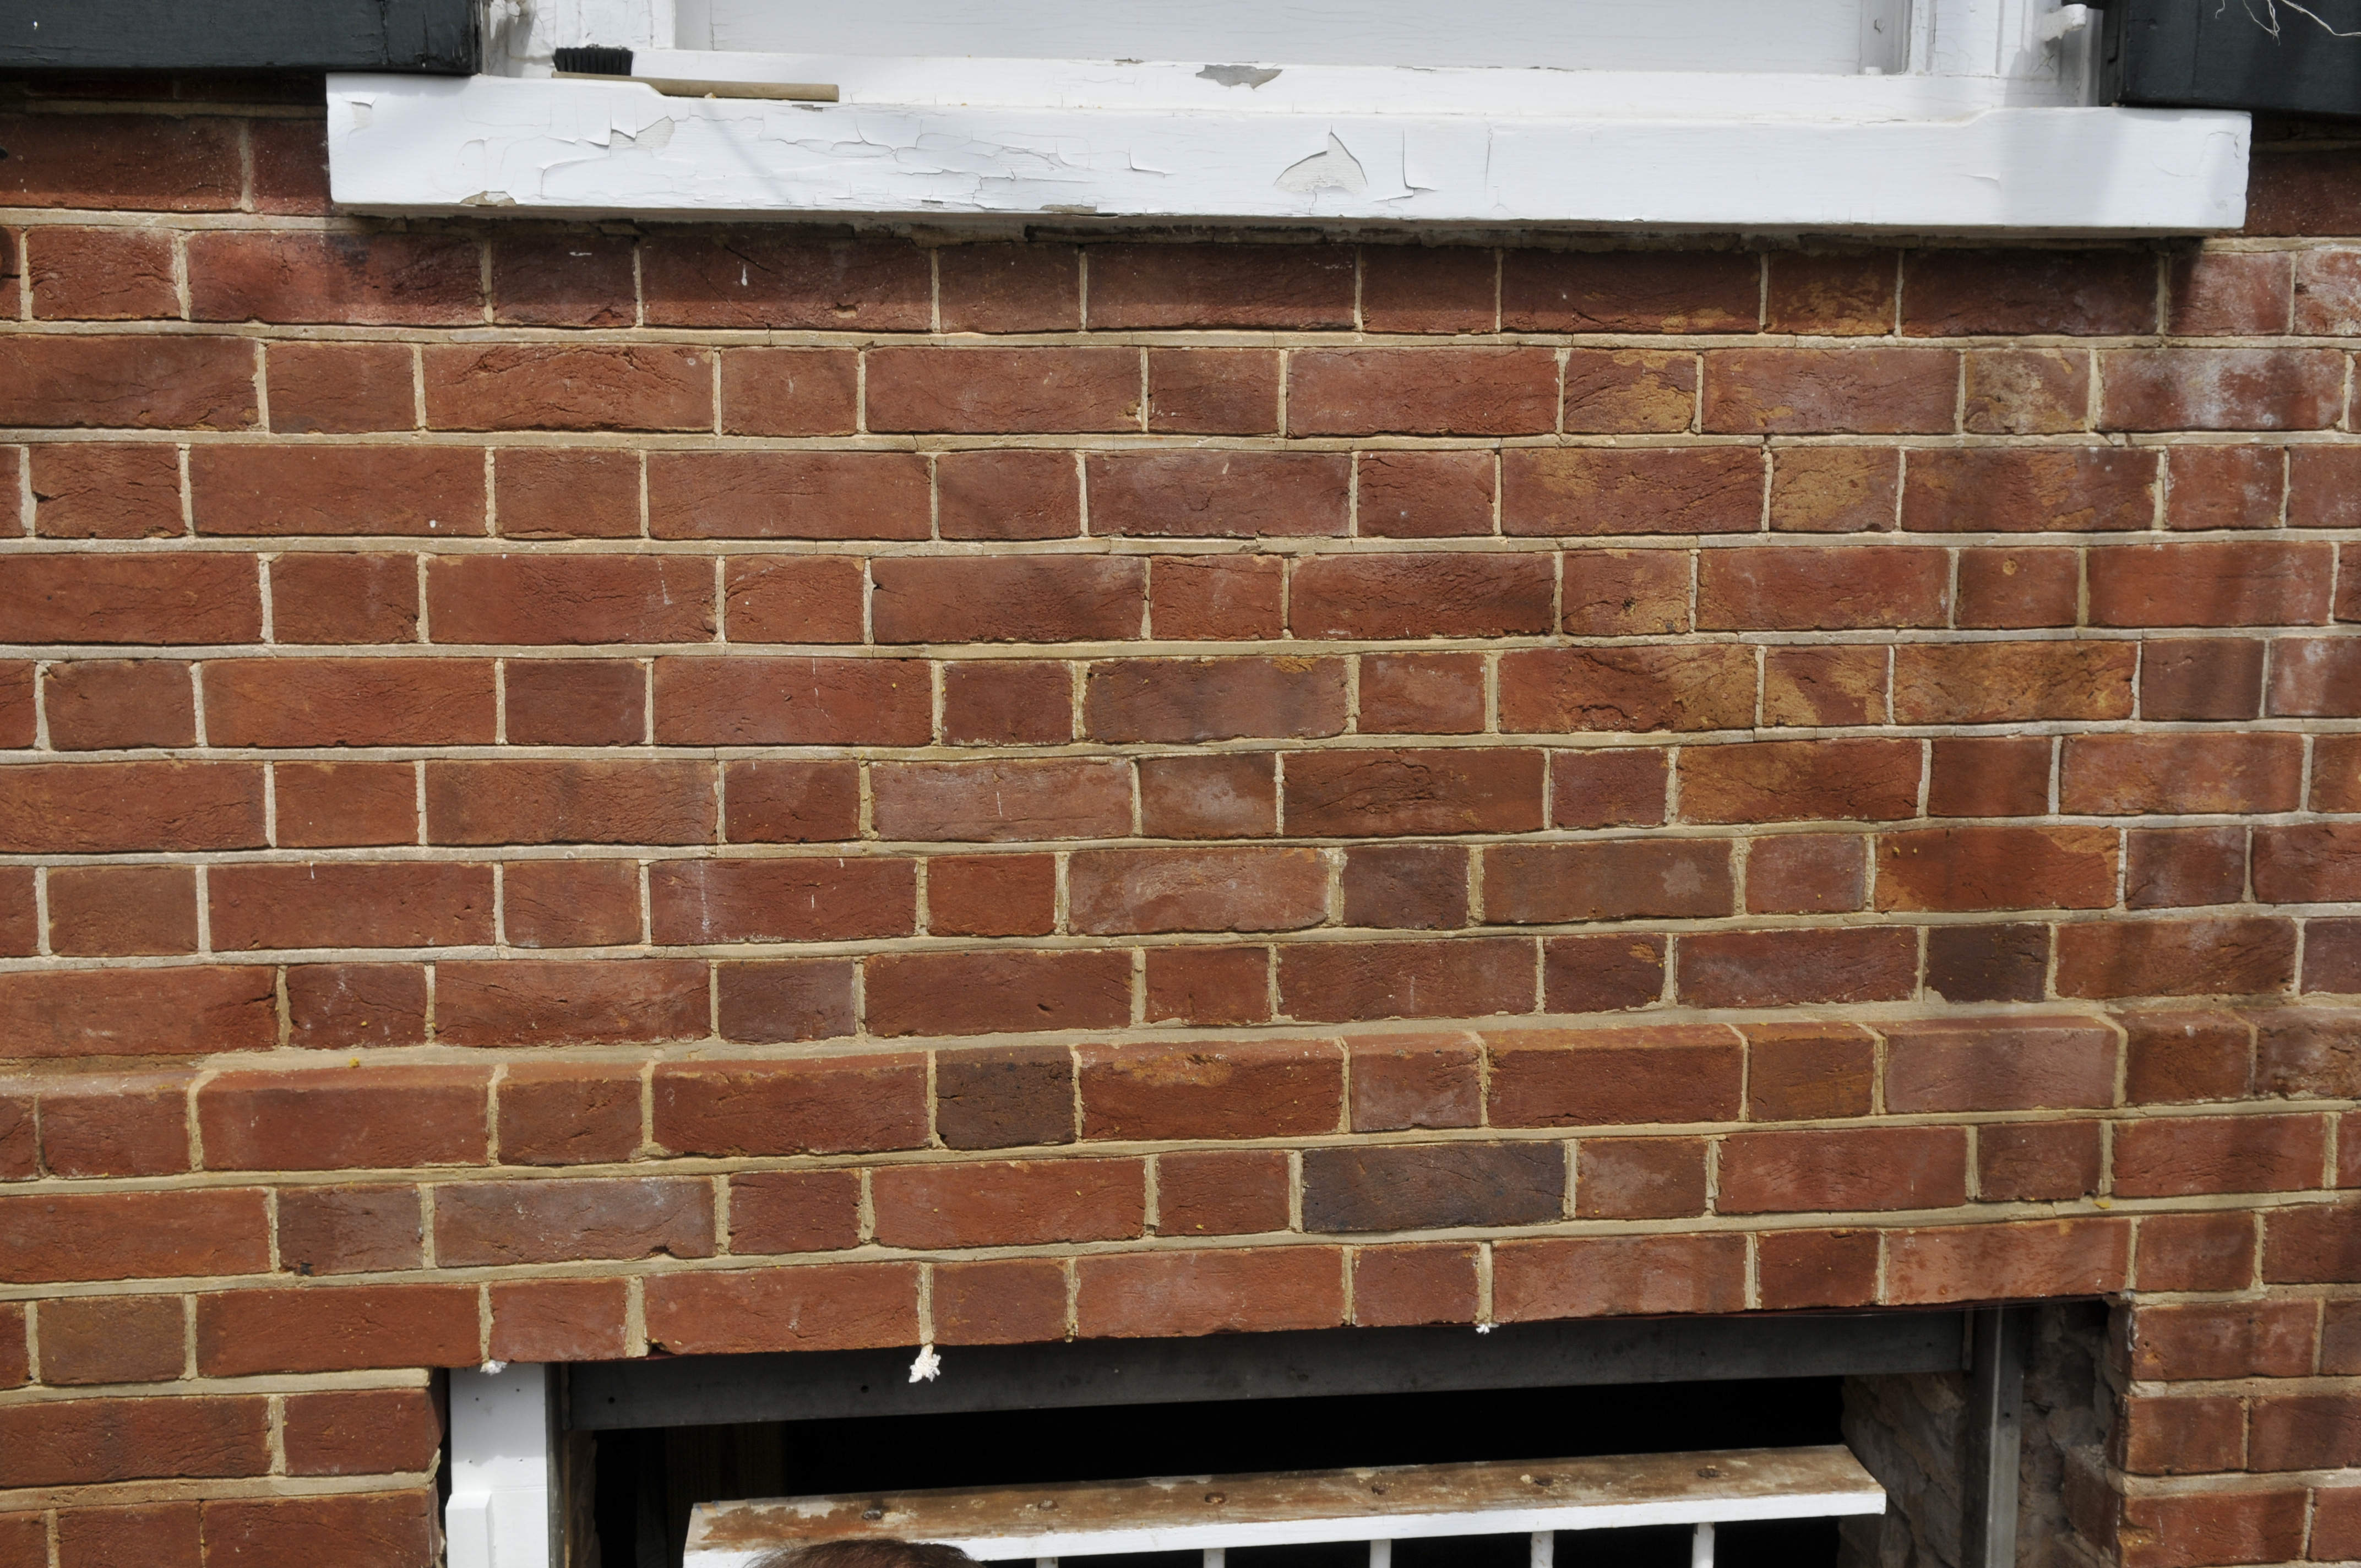
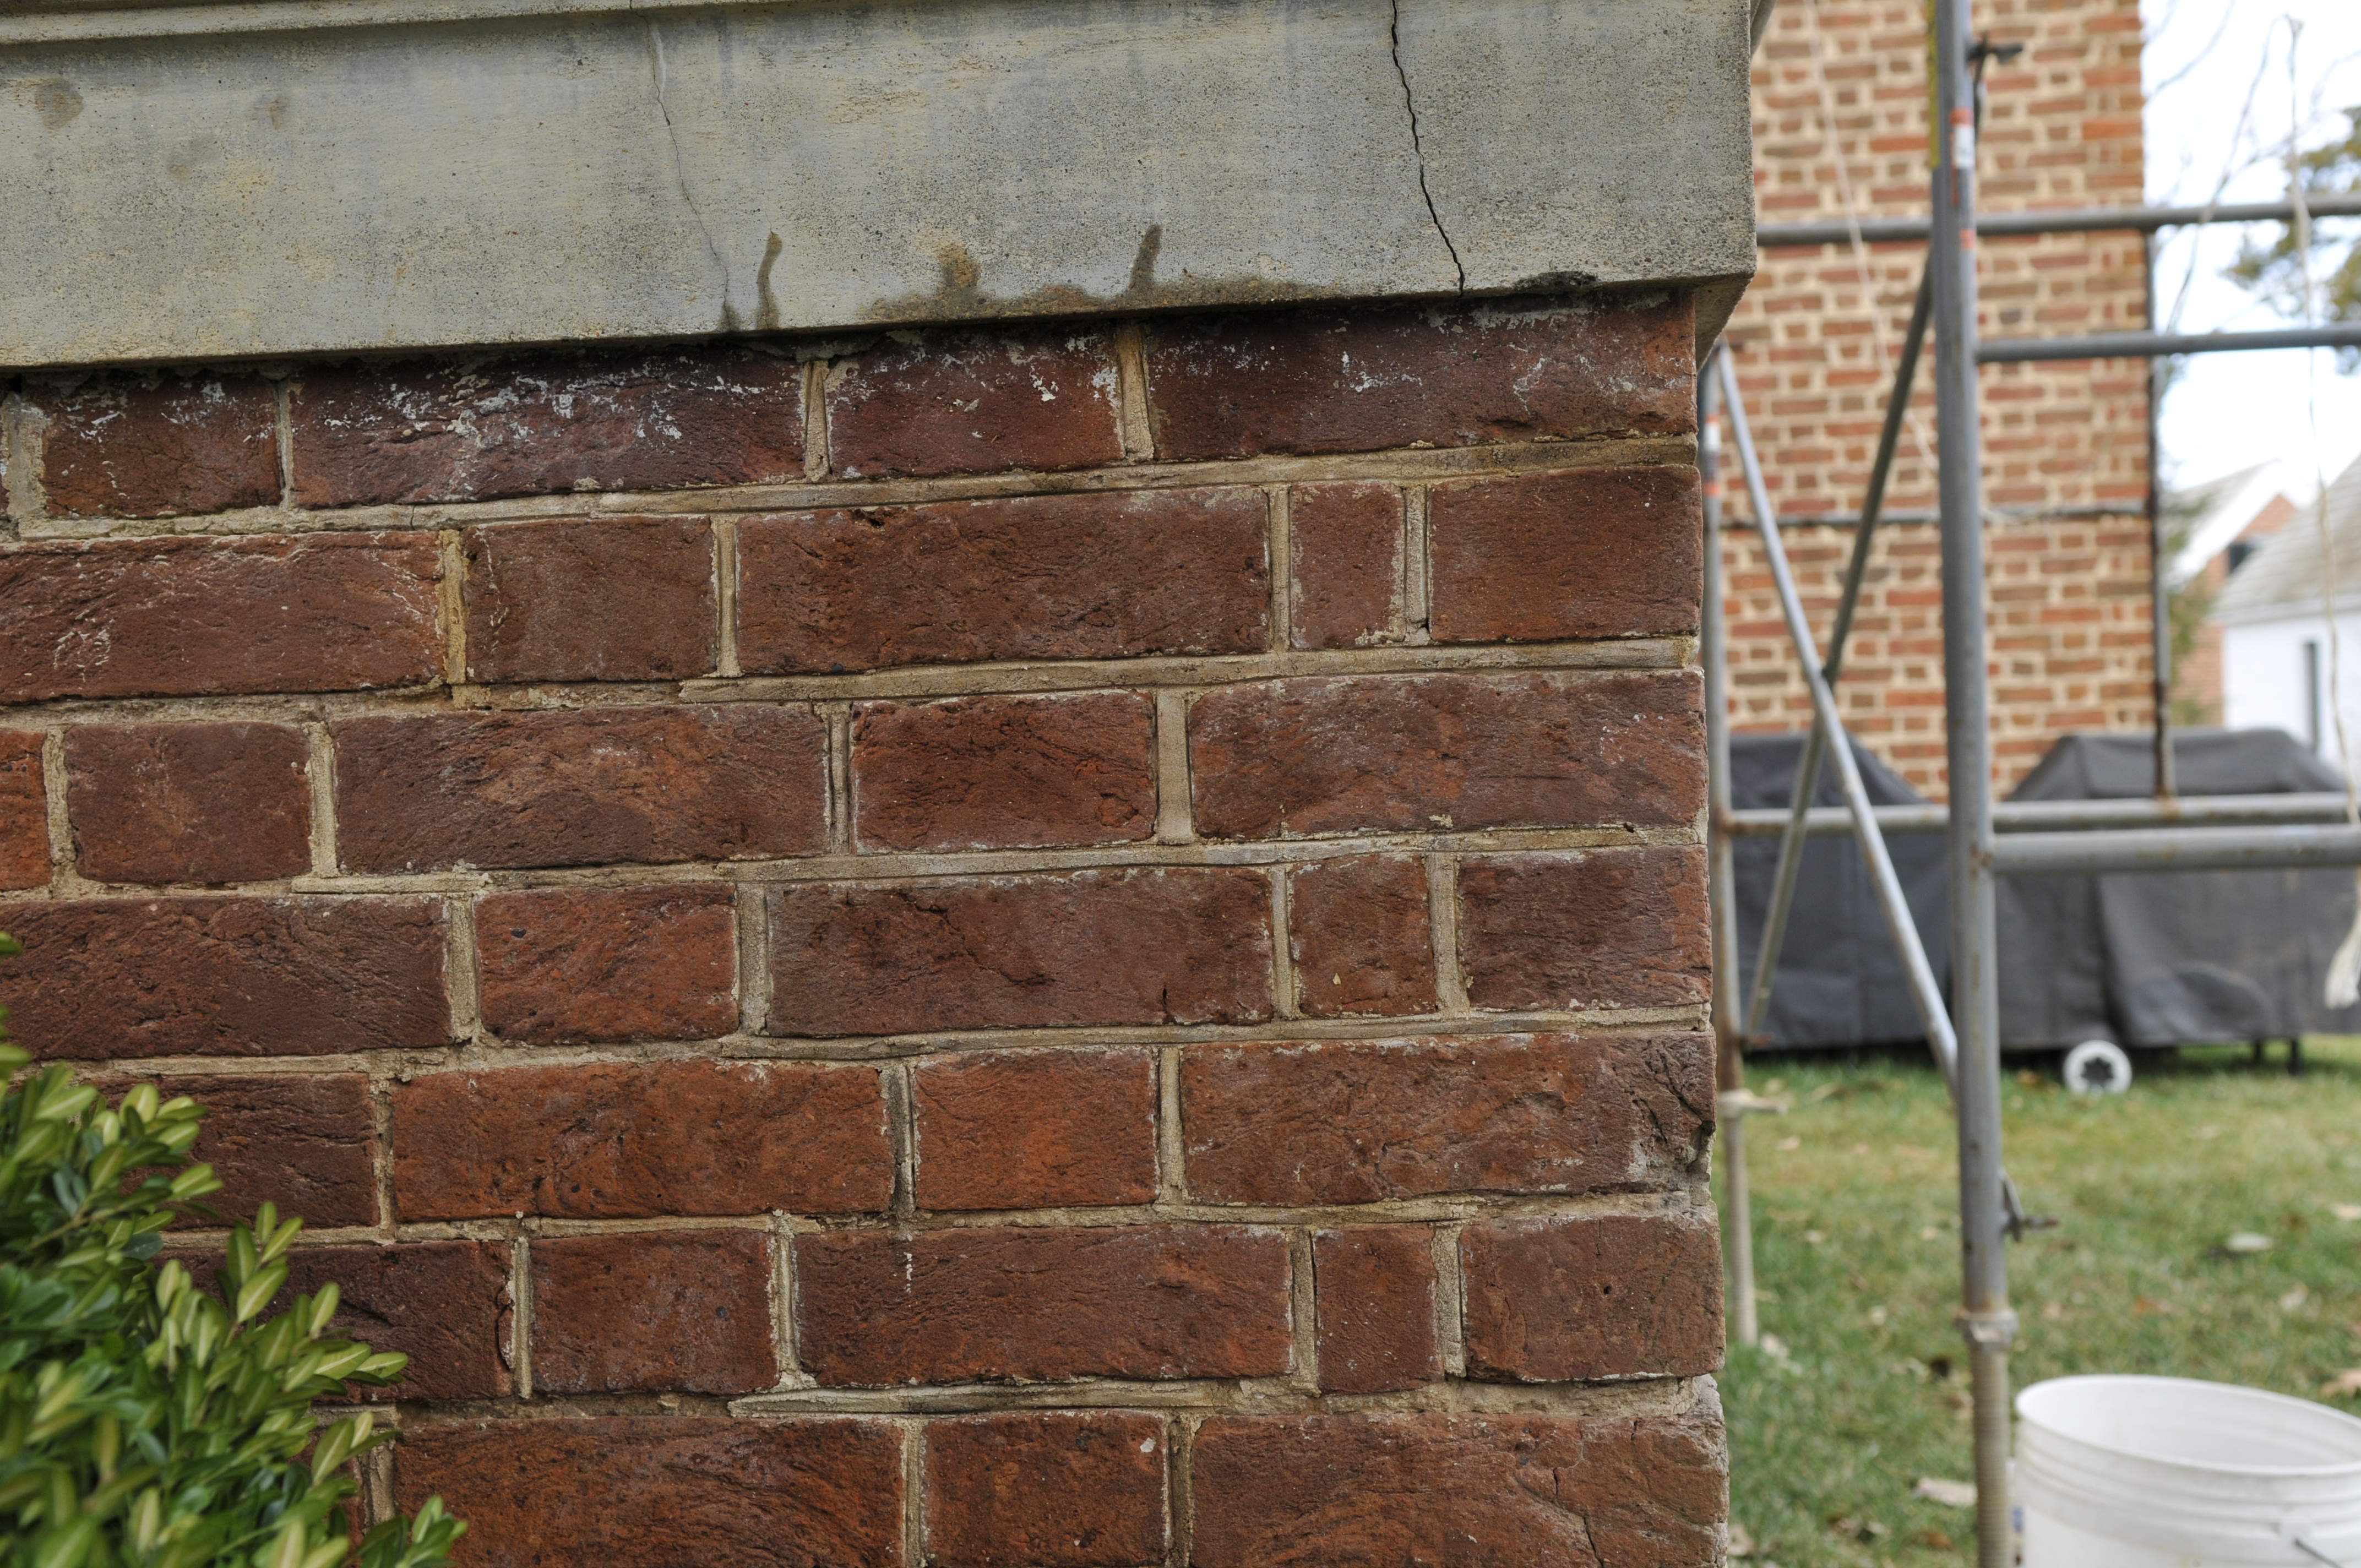
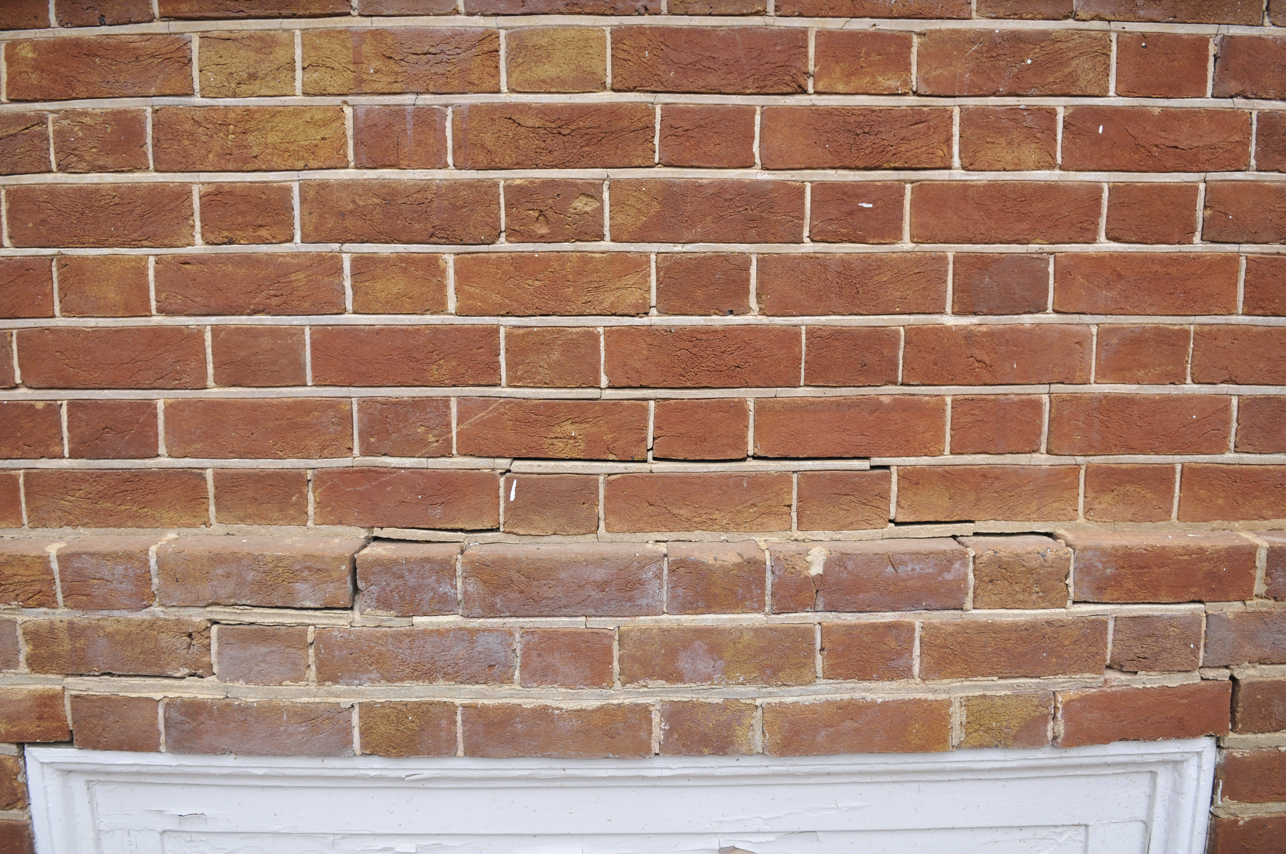
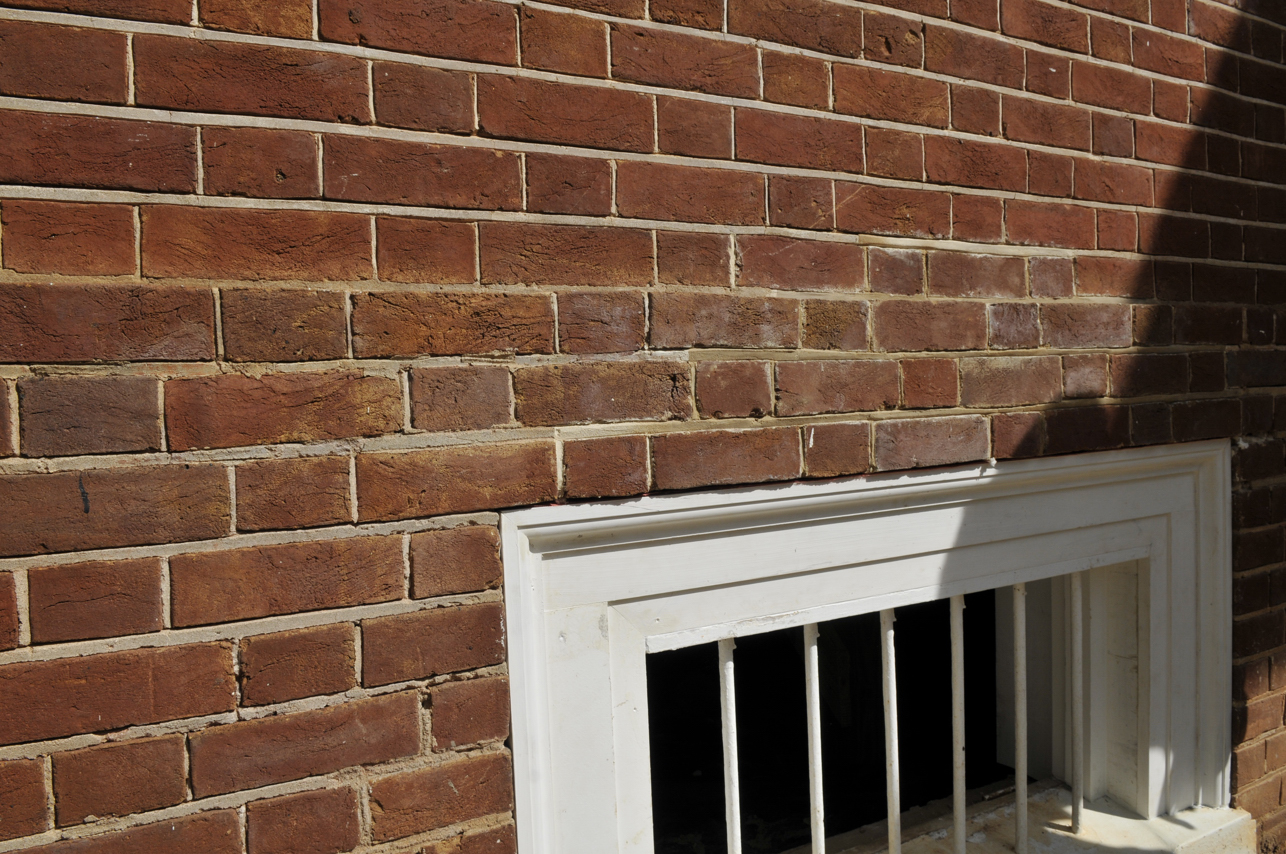
Below are some images of the finished work taken before the mortar has completely dried, so there are some variations in the mortar color, where it is still drying it is a little darker and more beige.
Before we began there was some white haze on the bricks over this window, as may be seen elsewhere on the building. This is, apparently, from the chalking white paint used on the window trim
that washes off with weathering and becomes deposited on the bricks below. We were not able to re-use all of the original bricks from this area, but had to substitute some from the basement where we
removed matching 1824 face brick from an area enclosed in the 1840 addition. These brick from the basement were only exposed to the weather for 16 years and to not have quite the same patina as the
bricks that have been in place outside in the weather since 1824. So there is a slight difference in the appearance of these basement bricks when mixed with the surviving bricks from over this window.
I will continue the before and after views as time permits, below are some more before views.

